Authentication
Single Sign on Passwort
A new password must be set up for the new customer portal. A modern authentication platform, the single sign-on, ensures secure access to your portals. In future, you will be able to easily log in to various customer accounts and portals with just one e-mail address and receive the corresponding access authorization.
First you need to enter your e-mail address and a password of your choice in the system. You can find clear instructions on how to do this in the following video.
Customer account
Create customer account
Watch the video below to find out how to open a customer account with peoplefone.
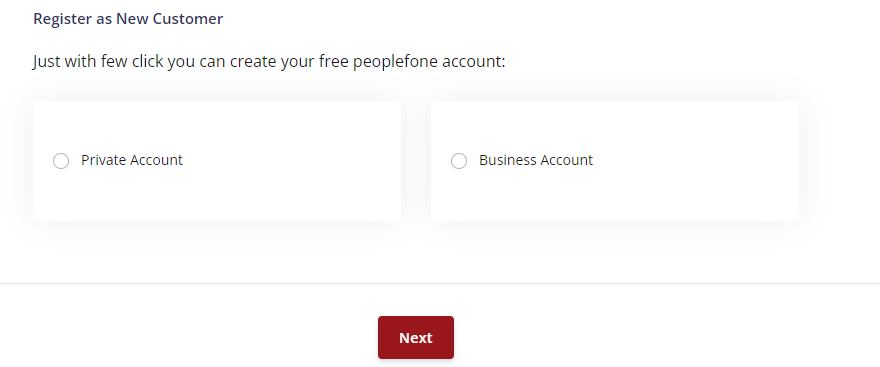
Regardless of whether you are a private or business customer – you can register free of charge on our website at any time. The standard SIP TRUNK account is also free of charge. In addition, you have the option of testing the peoplefone HOSTED (vPBX) service free of charge for 30 days.
2-Faktor Auth. / 2FA
General information
Our 2-factor authentication offers you additional security for your personal login.
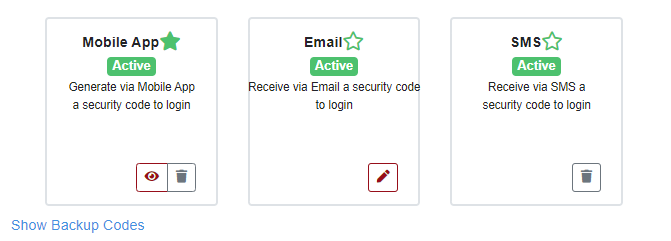
Authentication methods
A total of three different authentication systems are available. We recommend configuring at least two of them to increase the security of your access.
When setting up the Authentication APP and SMS authentication, email authentication is also activated at the same time.
Authentication APP / OTP application for partners and end customers
SMS for end customers only
E-mail for partners and end customers
Authentication APP/ Google Authenticator
Among other things, peoplefone supports the Google Authenticator for iPhone and Android devices, which can be downloaded from the App Store or Google Play. In addition, other OTP (One-Time Password) applications can also be used to enable authentication.
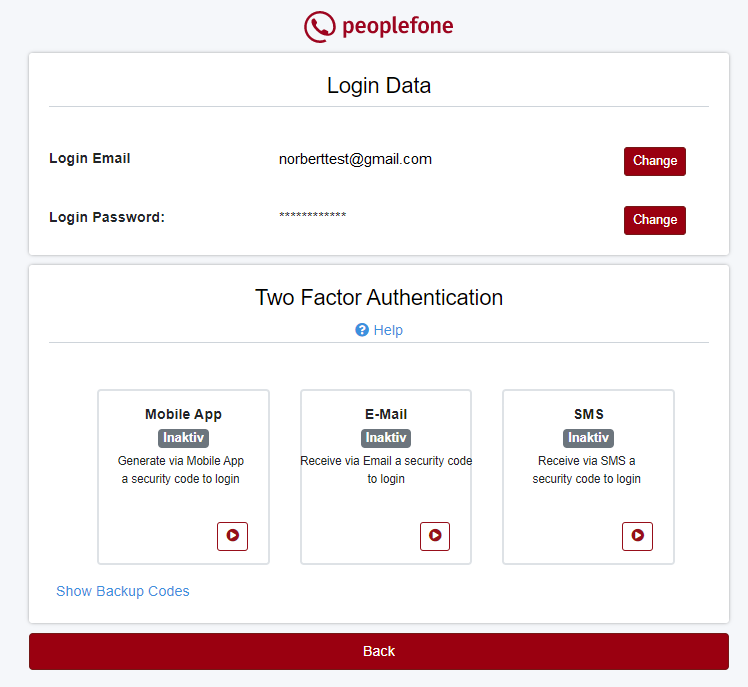
To set up 2-factor authentication for the Authentication APP, go to the user menu and click on Login Settings.

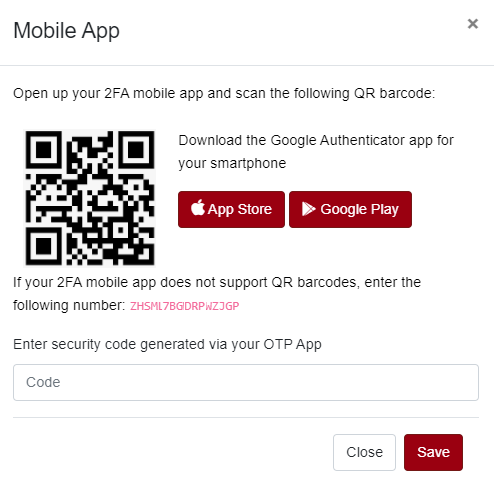
Click on the play button for Authentication APP
You can download the Authenticator for your device here. After installation, open the Authenticator and scan the QR code with your camera. Please answer the security questions with YES
If you do not have a camera and cannot scan the QR code, activation can also be carried out using setup keys.
Enter the code displayed by Authenticator in the field and click on Save.
We recommend that you set up 2FA via SMS, e-mail authentication is set up automatically.

Set up authentication via SMS
If you would like to set up 2-factor authentication via SMS
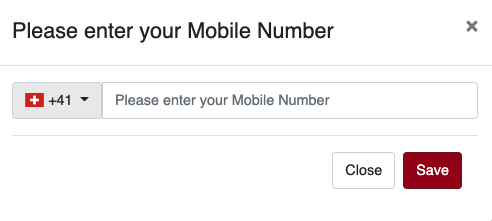
Click on the play button for SMS

Select the country and enter your mobile number
peoplefone will send you back an SMS. Enter the code you received in the field and click on Save. If you have not received an SMS, click on Resend SMS
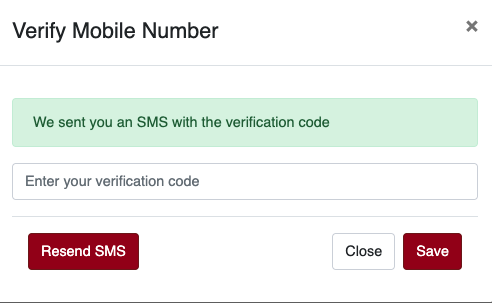
After successful setup, the jam is displayed as active for the respective authentication.
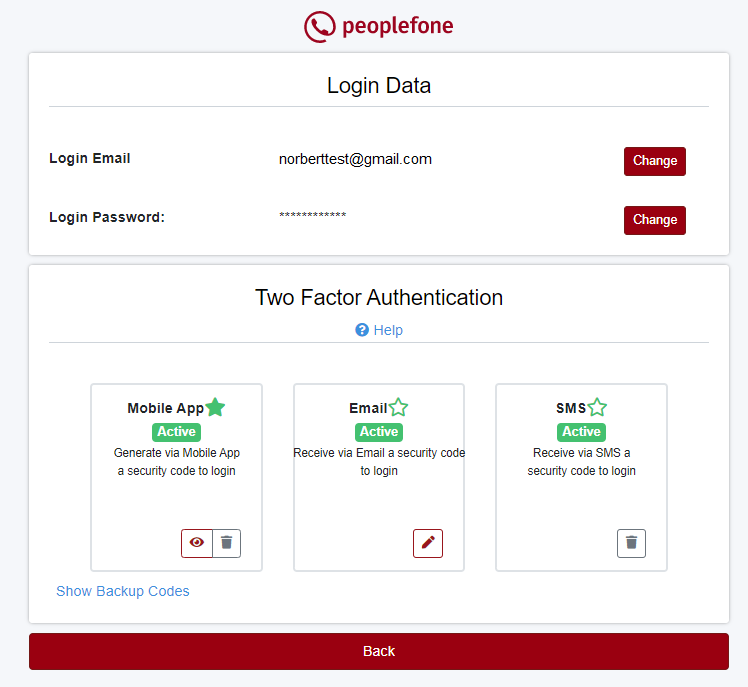
Set up authentication by e-mail
You can activate 2-factor authentication in the login settings of your customer account.
Click on the Play button to activate 2-factor authentication via Authentication APP, SMS or e-mail.

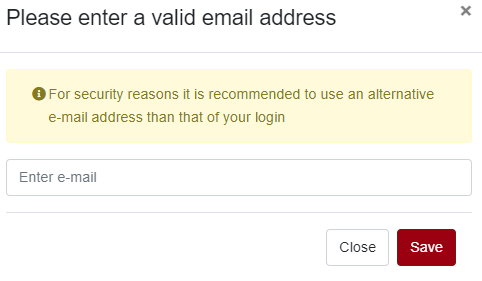
Your login e-mail address will be used as the default, this can also be changed at a later date.
Enter an existing e-mail address and click on save
We will send you a confirmation e-mail. Please click on Verify e-mail address.
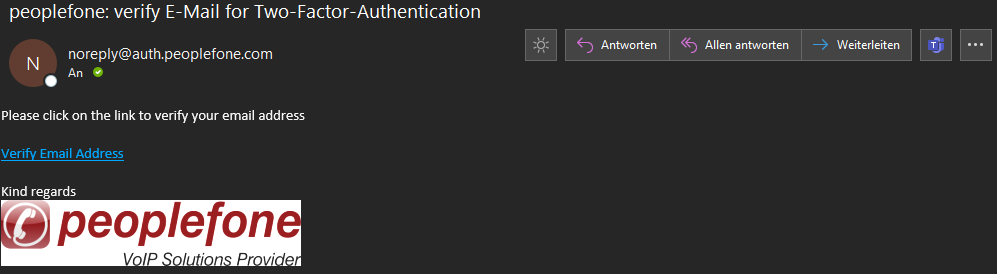
After successful activation, the status is displayed as active for the respective authentication.

Select standard authentication
You can define which your default authentication system should be. Click on an asterisk that is not filled in. If the star is filled in and green, you have successfully selected the default authentication system.
The default authentication here is the Authentication APP.
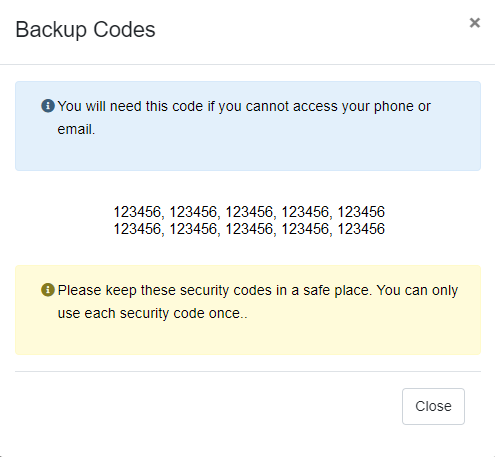
Backup codes
If all else fails and you have no access to e-mail, Authentication APP or SMS, you still have the option of using a one-time password (a scratch list). For security reasons, we recommend keeping this in a safe place. A password can only be used once.
ATTENTION: Save the backup codes and keep them in a safe place!!!
You can display the codes – Show Backup Codes
You can also exchange the codes – Replace Backup Codes

Save the one-time passwords or print them out
Keep these passwords in a safe place
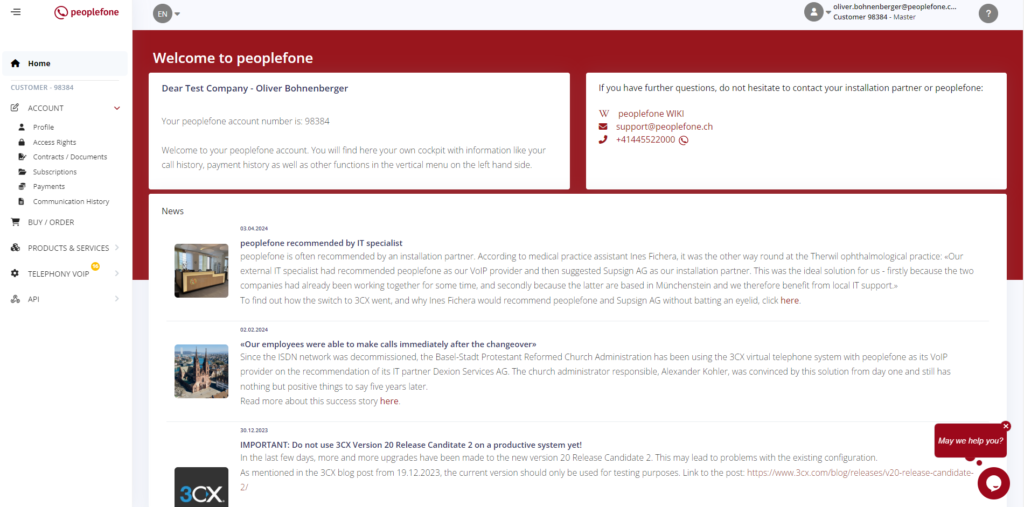
Account overview
After successful authentication, you will be taken to the welcome page. As a customer, you have the customer account menu, the user menu, help and knowledge base and the main screen on the left-hand side. This screen mainly displays news and the system status of all peoplefone services.
Languages

The customer portal is available in four languages: English, German, French and Italian.
User Menu
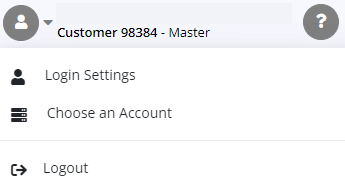
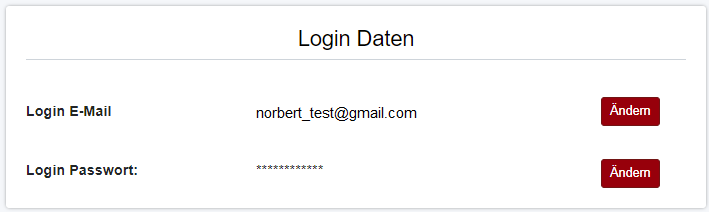
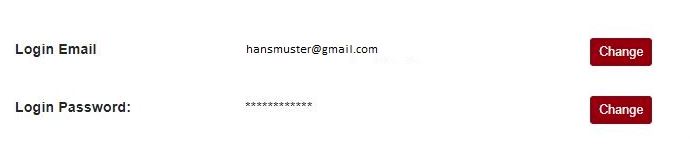
Login settings
In the login settings, you have the option of changing your own login e-mail address and password.
Select account
A new SSO “Single Sign On” authentication point allows you to log in to several customer accounts or other portals with one e-mail address. Of course, you must have the necessary rights in the respective customer account under access rights. Further information on access rights can be found here: Access rights
As you can see here, this user is registered in three different platforms (administrator, customer and peoplefone HOSTED user). Click on the desired tab and then on the account.
The Admin tab is selected here to call up all administrator accounts. Select the portal at the top and the account you want to log into at the bottom.

Log out
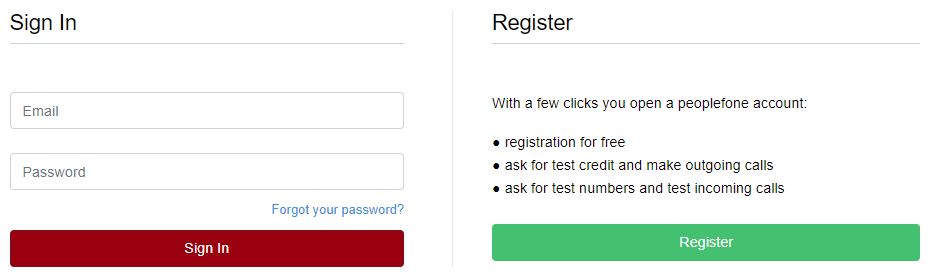
If you click on Log out, you will return to the “Log in and register” page.
Log in: Here you can log in to an existing customer account.
Register: If you do not yet have a customer account, you can create one free of charge.
Help

If you need help with the peoplefone customer account or other products, then the peoplefone WIKI, the peoplefone knowledge database, is at your disposal.
Menu structure


Home

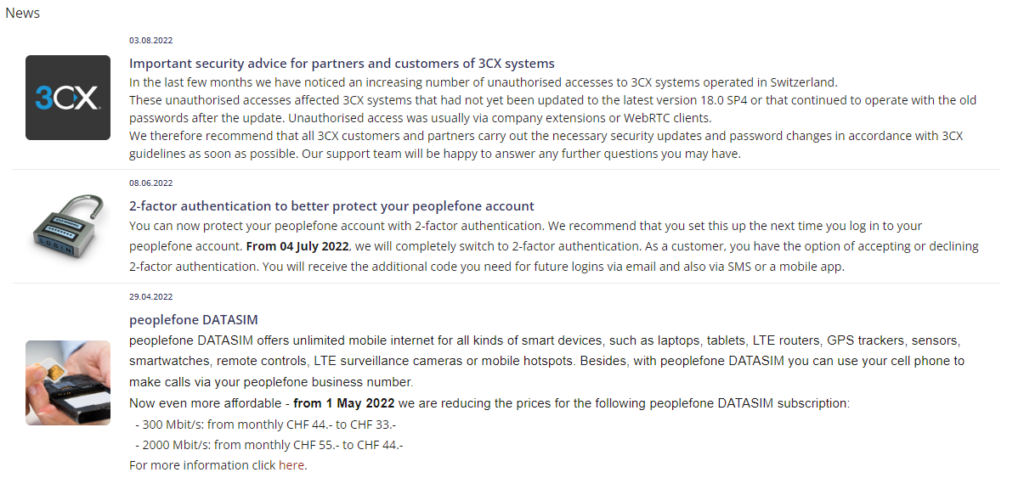
In the news section you will receive regular updates and news from peoplefone.
News
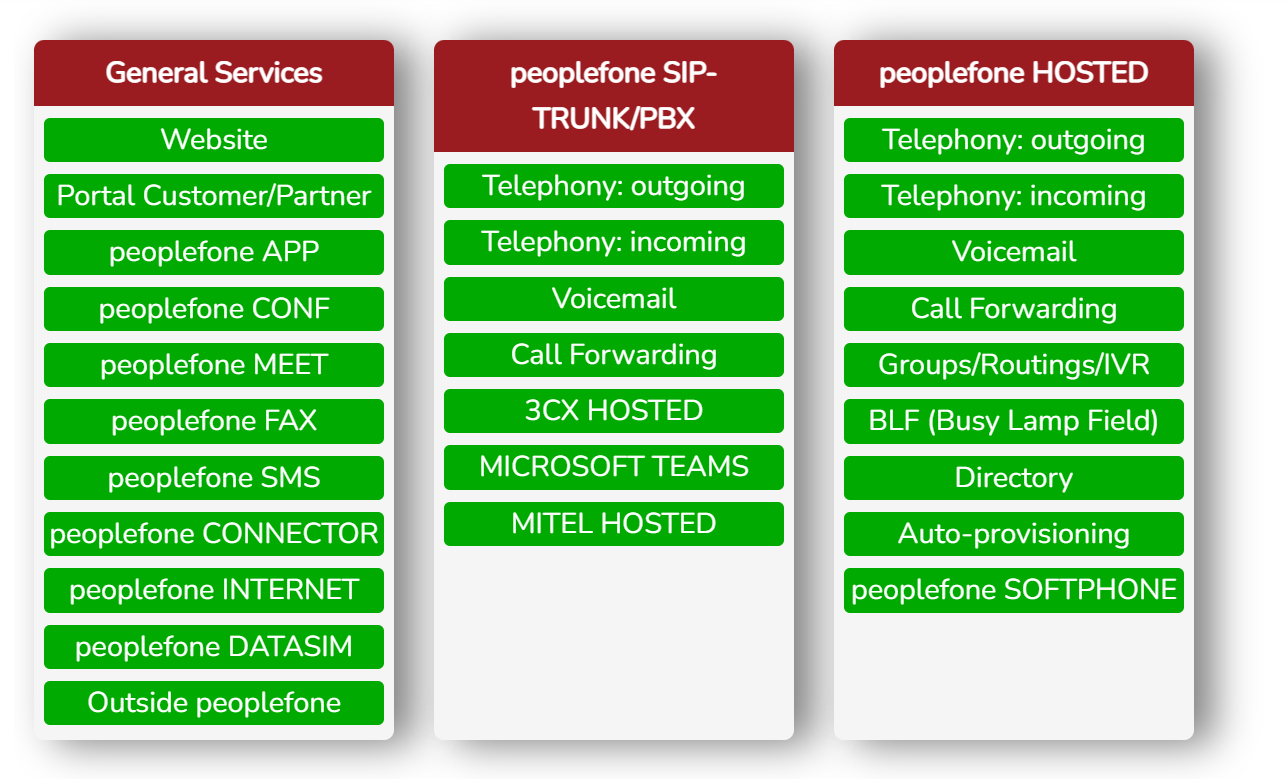
System Status
In the event of a fault with one of our services, you will find the latest updates here. In the event of a fault, our employees and band announcements will refer you to this page. You will be regularly informed about the current status here.
You can check the status of our services at any time on our website or in your customer account under HOME.
Events

Symbols
Here is the meaning of the various pieces of information.
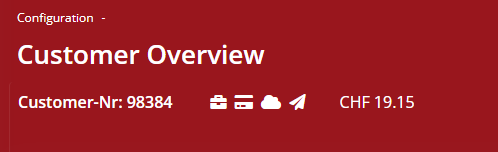
When calling peoplefone customer support, you will be asked for the customer number, e.g. 98384. The case means that this account is a business account private account without a case. The cloud means that it is a peoplefone HOSTED (vPBX) system. The airplane means that the account is used as a test account. The credit balance is displayed in the respective currency of the platform CH, DE, AT etc. A dollar sign means that the customer has been switched to postpaid.
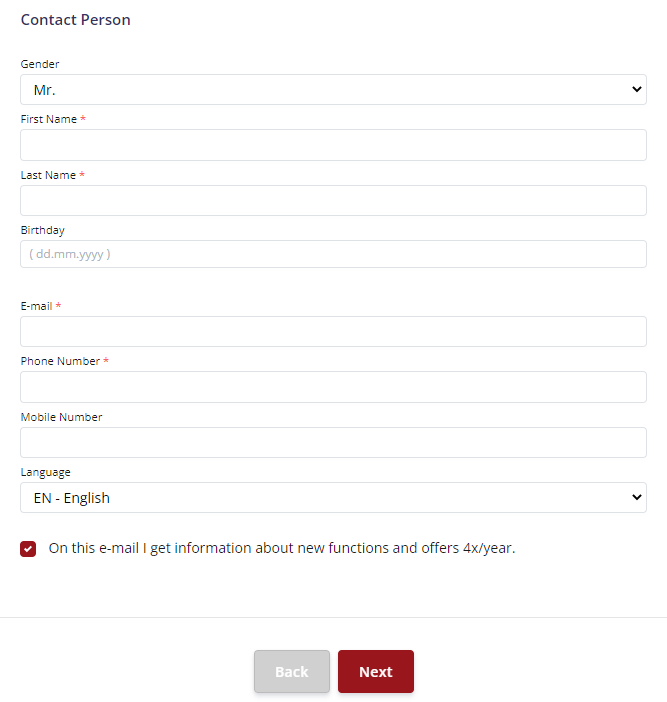
New customer

Only partners or administrators have the authorization to create new customers via the partner portal. This menu is hidden for end customers. End customers can register directly via the website peoplefone.ch.
Fill in the fields and click on continue.
Search

The customer search is reserved for admins and partners.
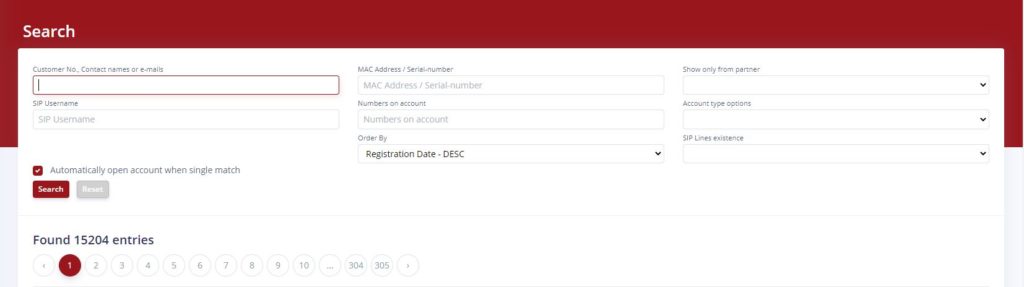
Search parameters
Various search parameters are available to help you find customers easily.
- Customer No., Contact names or e-mails
- MAC Address / Serial-number
- Show only from partner
- SIP Username
- Numbers on account
- Account type options
- Order By
- SIP Lines existence
Einen Kunden aufrufen
After a search, you can call up the customer by clicking on the cogwheel.

Account
You will find this menu structure in the customer account, click on the icons and you will be forwarded directly to the respective article. You can also see what exactly is in the menus. Here you will find information on the individual menu items and what the functions and options are.
Click on a menu item to call up the desired area.


Profil
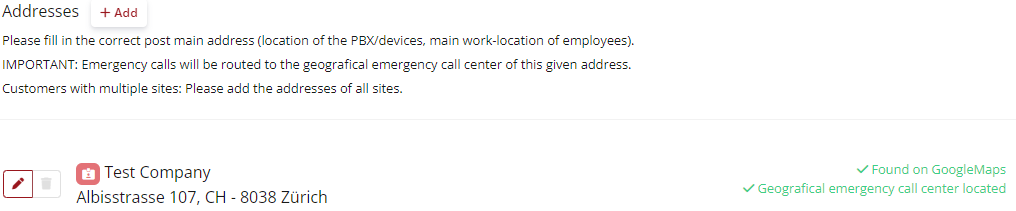
Addresses
In the profile area, you can store several addresses as well as several contacts. These are required if you have several locations or several users need to be informed, then you can store these in the system.
In the addresses area, you can create an address for your locations, which can then be selected and added in the contacts. For emergency routing, you need a contact for each location.
To create a new address, click on +Add
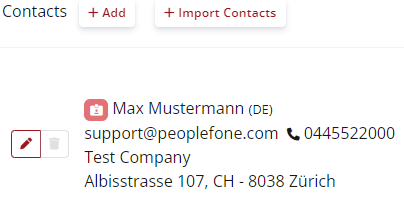
Contacts
To create a new contact, click on + Add.
If you want to import contacts, you can do this using an Excel file.
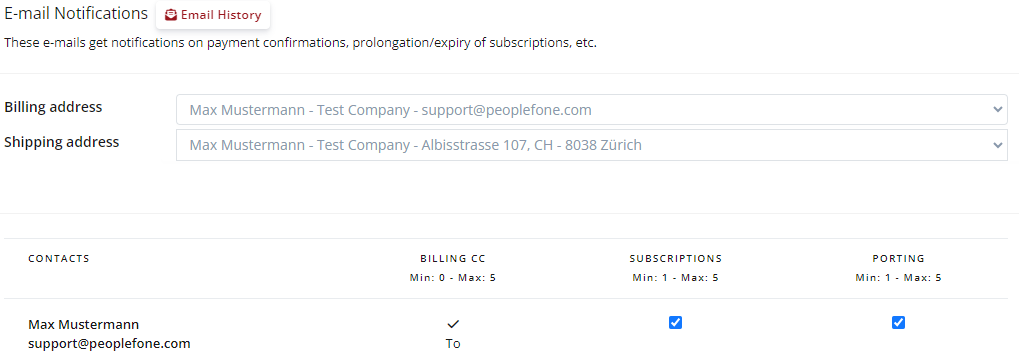
E-mail corrections
The e-mail history helps you to check which e-mail you have received from peoplefone as a reminder. If you have not received any reminders, you can check here whether peoplefone has sent any.
Click on Email history to view it
You can also set the billing and shipping address as desired. If you have added additional contacts, you can define who should be informed of reminders about invoices, subscriptions and porting matters.
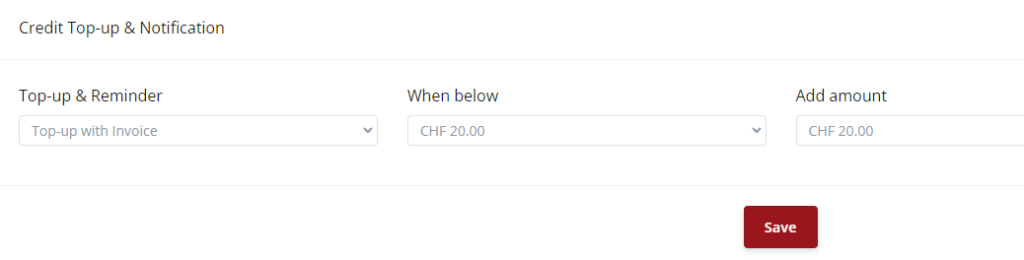
Credit balance Notification
Here you can instruct the system when to send you a reminder if the credit falls below a certain threshold.

Here you can define how the value must be set so that you receive the reminder in good time and you can top up credit.
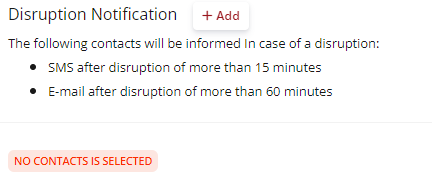
Fault message
Here you can specify who should be informed about faults at peoplefone.
Click on + Add to add someone
Access rights
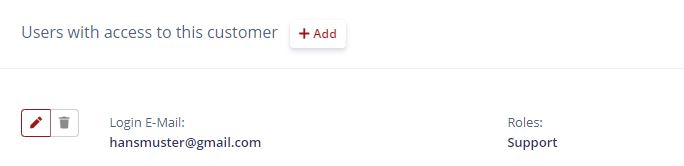
Users with access to this account
In this area, you can specify which people are allowed to log in to the customer account and where exactly you are allowed to have access.
To add another access, click on +Add
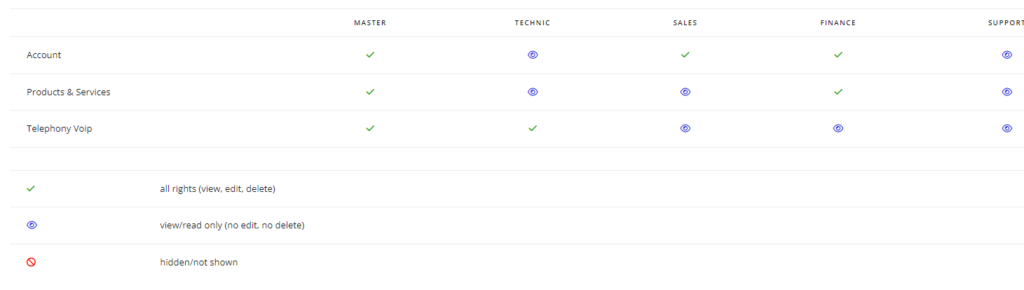
Roles and authorizations
There are five different roles available to you Master, Technic, Sales, Finance, Support
Contracts / Documents
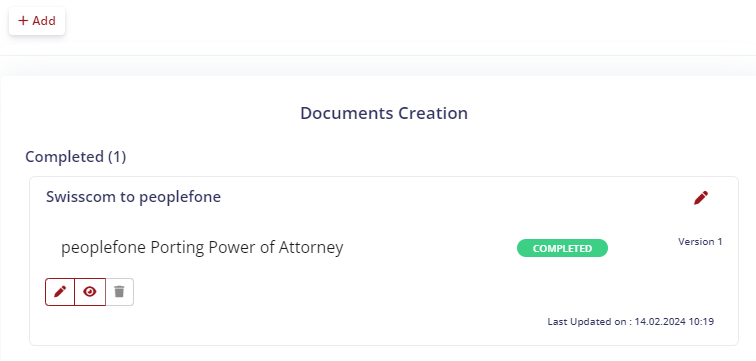
Create documents and contracts
In this section you will find all the contracts that you may need to fill out with peoplefone. This is intended to be a help, as a lot of information is already filled in on the basis of stored contacts.
Click on +Add to create a new contract
peoplefone business contract video
Send documents back to peoplefone
ATTENTION: The documents verified by the system must be signed and sent back to the e-mail address specified in the document. Only then can the documents be processed further.
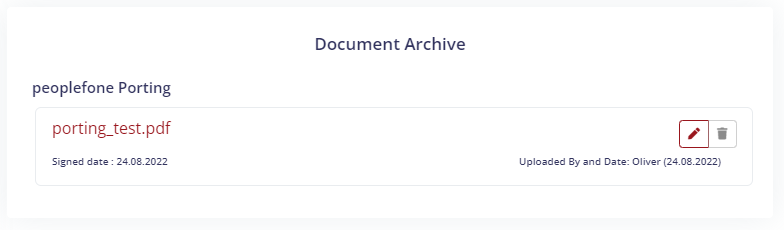
Document archive
peoplefone saves the documents and contracts in the archive after approx. 2-4 working days following submission. As a customer, you then have the option of viewing and downloading the stored documents.
Subscriptions
Overview of subscriptions
To get an overview of your subscriptions, click on Subscriptions in the customer account. Prepaid customers manage their subscriptions themselves and renew them automatically or manually if necessary.
Activate & renew subscriptions
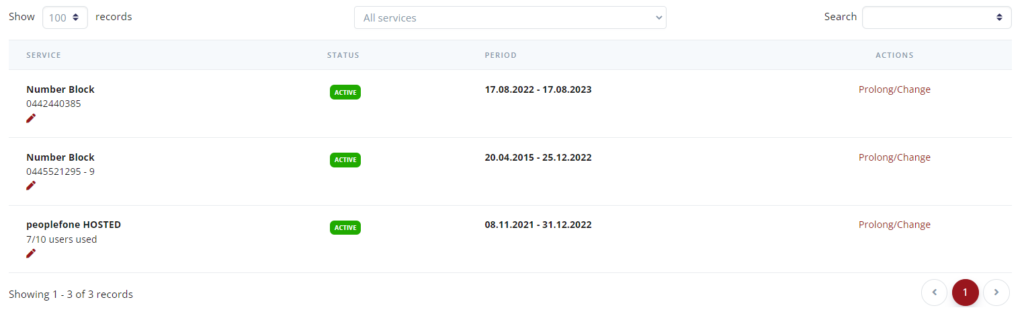
If you have received a reminder from peoplefone to renew a subscription, log in to your customer account. Click on the menu on the left under Subscriptions to see an overview of all your subscriptions.
For subscriptions that are due to expire, click on Renew / Change at the bottom and follow the system’s instructions.
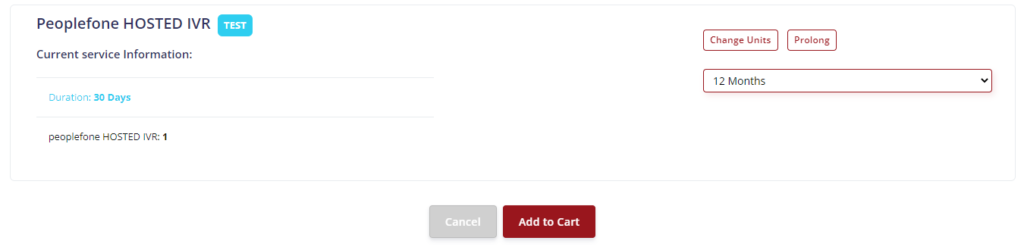
In this example, we would like to extend the IVR subscription for another month.
Click on Extend / Change
Change units or click on Extend / Change
Select the number of months and click on Add to cart

We select the number of months and click on Add to cart.
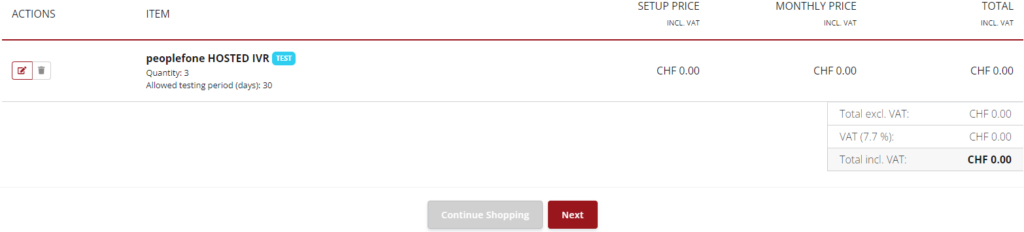
You will receive an overview of our shopping cart and click on Next
Select how you would like to pay and follow the system’s instructions. If you make further purchases, you can save the credit card information (save this payment data for future payments).
Then click on Numbers.
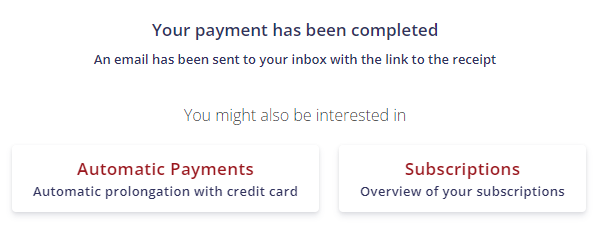
If the payment was successful, you will receive this screen. Click on automatic payments to configure them (automatic renewal of the subscription). Click on Subscriptions to go to the overview of subscriptions.
Payments
All invoices are saved here and can be retrieved. If you have purchased a number, this store purchase will be displayed here in an invoice.
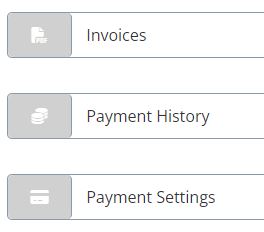
There are three different areas, invoices, payment history and settings for the invoices.
- You will find all invoices under Invoice
- The payment history shows you all payments
- Settings for payments can be made here (store credit cards, automatically top up credit, automatically renew subscriptions)
Invoices
Under Invoices you can view all invoices and download them as PDF files.

Payment overview
In the payment overview, you can track which payments have already been made or are still outstanding. You can also view or download all PDF documents here.

Payment settings
There are two ways to automatically renew a subscription.
- Subscription renewal with credit card on file (CH private card)
- Extension with existing credit
ATTENTION: If you renew subscriptions automatically using credit, your credit may go down to CHF 0. When you receive reminders from peoplefone, please check which subscription is expiring and top up your account with the corresponding credit.
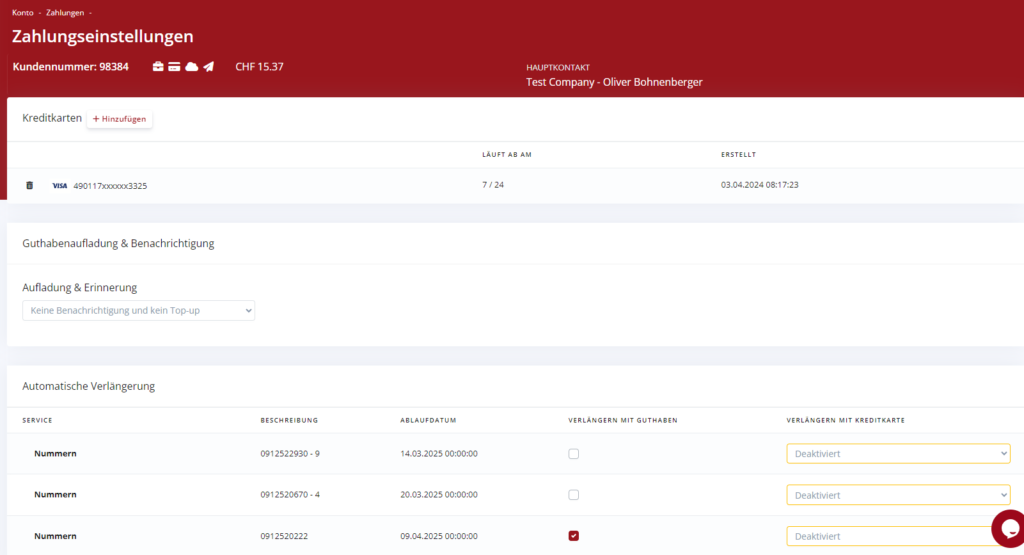
Add and configure credit cards.
Add a credit card to the system to either automatically top up telephony credit or extend subscriptions. To add a credit card, click on + Add
Automatic top-up for telephony credit
Select a threshold value here for when additional telephony credit is to be purchased from the credit card, determine how much credit you would like to purchase. Select the credit card to be used for the booking.

Automatic subscription renewal
There are two options for automatic subscription renewal. If you have sufficient credit on your account, a subscription can be extended with it. If you have a credit card on file, a subscription can be extended with it.

Communication overview

Call history of the last 6 months
The last 6 months are available for download in the system, here you can download the desired excerpts in PDF format.

Export to Excel
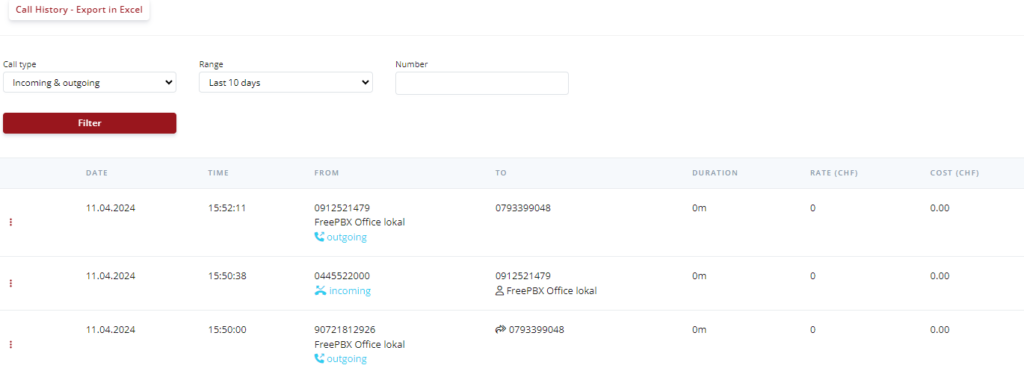
You can export an Excel report of your call overview via the system. You can also display the calls online according to certain filter criteria.
Search and filter
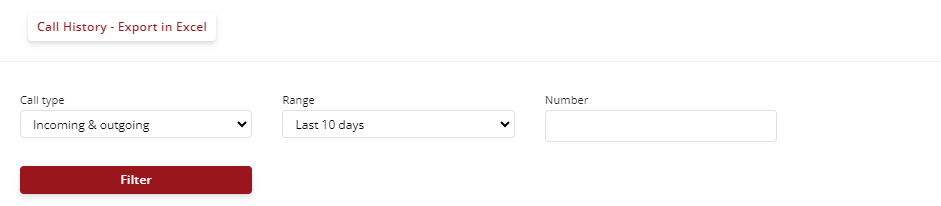
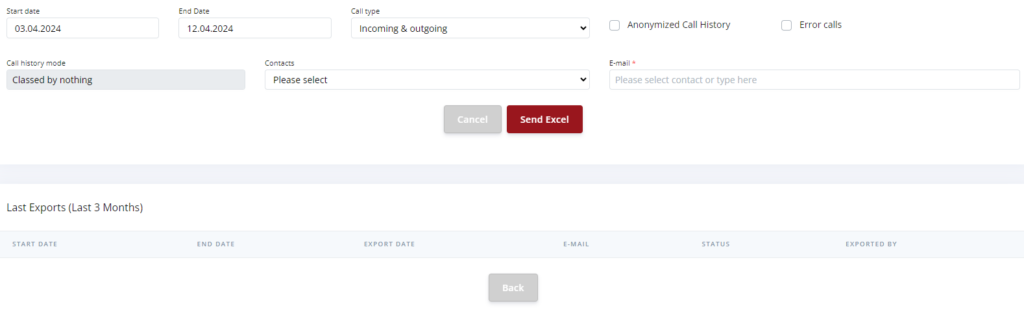
You can use various filters for the communication overview and have the data received sent to you by e-mail.
Buy / Order

Under Buy / Order you can buy peoplefone products just like in a web SHOP. For example, if you are interested in our peoplefone HOSTED system, you can set up a system in just a few steps and free of charge for 30 days. When a new customer account is created, a standard SIP TRUNK account is always created.
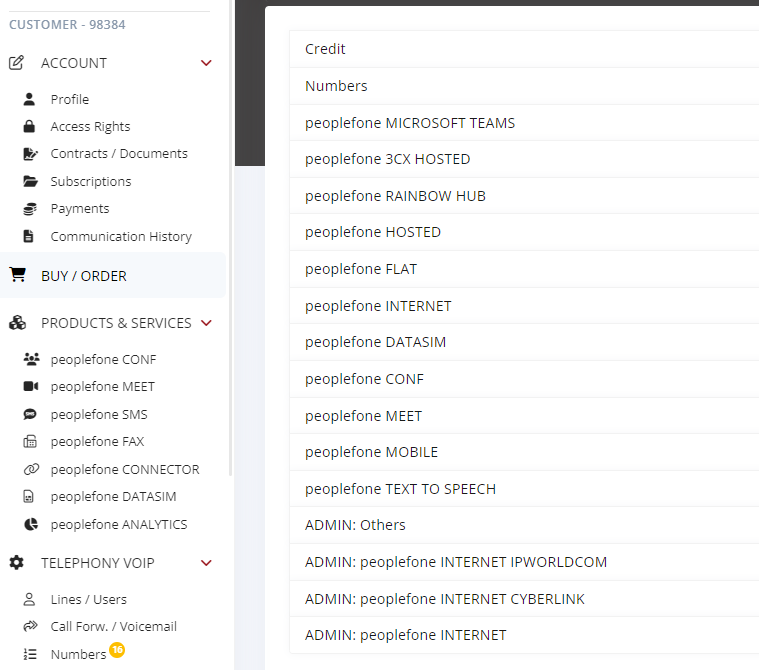
Products overview
Here you will find an overview of the products and features that you can buy and order in the peoplefone SHOP.
| Credit balance: | CHF. 10.-, 20.-, 50.-,100.-, 200.-, 500.- |
| Numbers: | 058-Nummern, Internationale Nummern, Portierung von eigenen Nummern |
| peoplefone MICROSOFT TEAMS: | Operator Connect, Direct Routing, SBC PLUS |
| peoplefone 3CX HOSTED: | peoplefone 3CX HOSTED, peoplefone 3CX VoIP Manager |
| peoplefone RAINBOW HUB: | RAINBOW HUB |
| peoplefone HOSTED: | peoplefone HOSTED, peoplefone SOFTPHONE, peoplefone HOSTED IVR, peoplefone CONNECTOR API |
| peoplefone FLAT: | FLAT Minuten CH, FLAT Minuten CH + EUROPA |
| peoplefone INTERNET: | peoplefone INTERNET, Managed Services |
| peoplefone DATASIM: | peoplefone DATASIM eSIM, peoplefone DATASIM Karte |
| peoplefone CONF: | peoplefone CONF |
| peoplefone MEET: | peoplefone MEET, peoplefone MEET – Sessionen |
| peoplefone TEXT TO SPEECH: | peoplefone TEXT TO SPEECH |
Information video Buy / Order
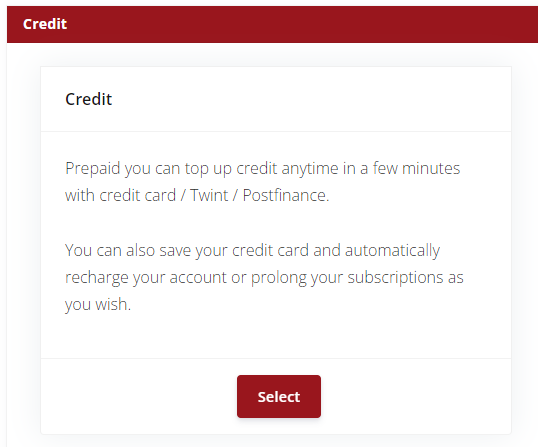
Buy credit – example
You can buy your desired amount of credit for making calls at any time online in your peoplefone account under Buy / Order – Credit. Payments by credit card, PayPal or PostFinance E-Card take a few minutes. When paying by e-banking with the QR code, the transfer to your peoplefone account will take 2-3 working days.
Click on Select.
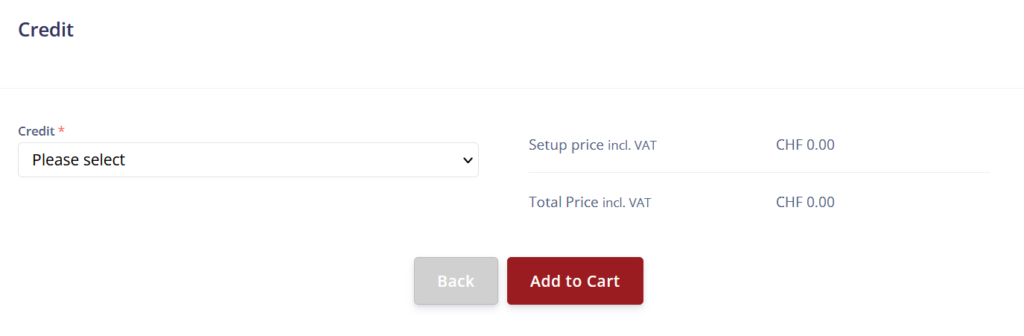
Select the desired amount. Then click on Add to shopping cart.
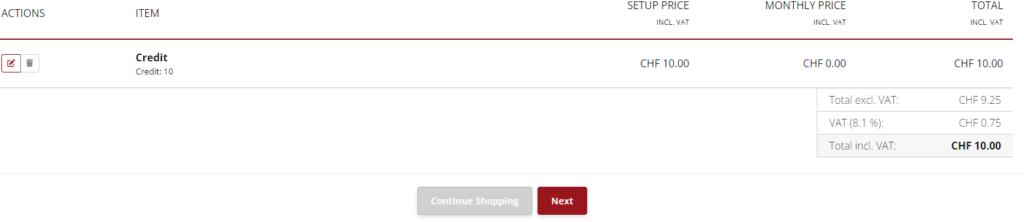
Click on Continue.
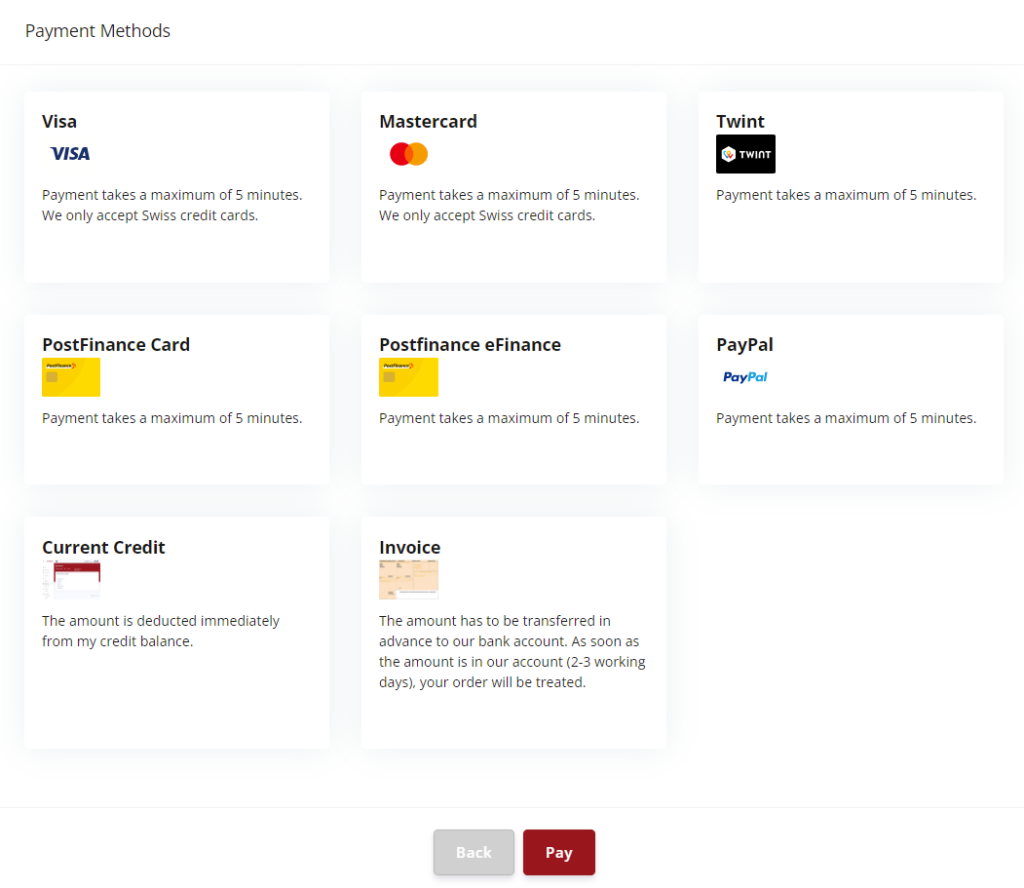
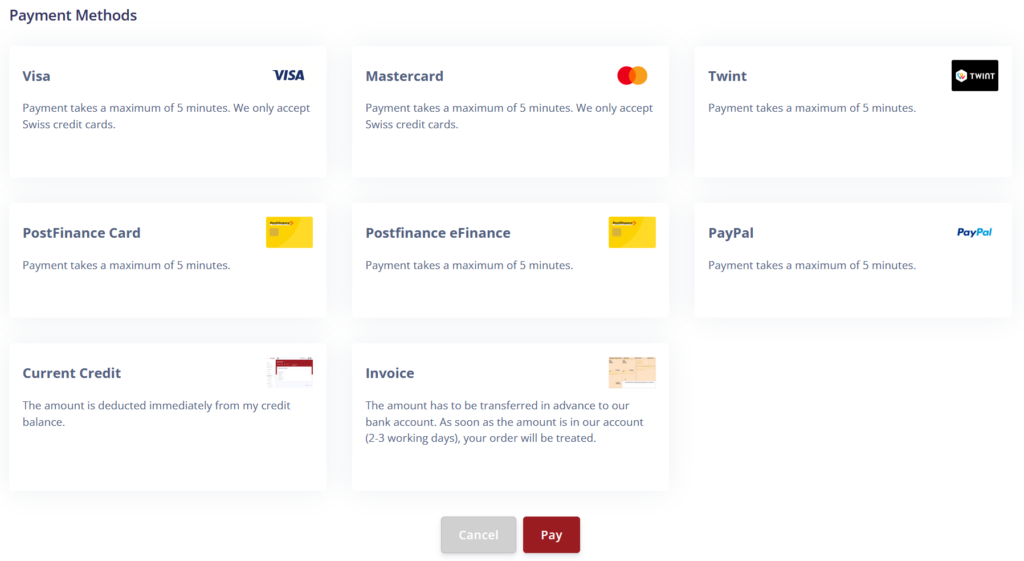
Select the payment method and then click on Pay, click on the desired field.
Produkte & Services
Click on one of the menu items to go to the corresponding article.


peoplefone SMS

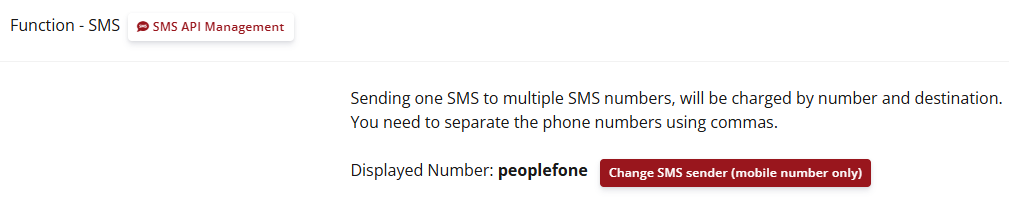
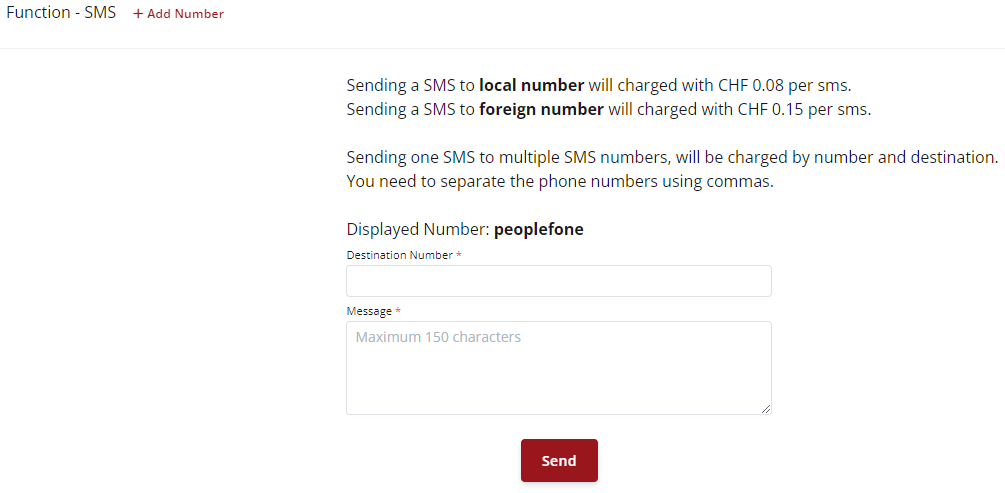
You can store your mobile number in the system and then call the number specified in the system from your mobile. As soon as the number has been verified, you can send SMS messages via the customer account by entering the destination number and the message. Only SMS messages can be sent; it is not possible to receive SMS messages. If you want to write to several destination numbers, they must be separated by commas.
peoplefone FAX

Fax2Email
To receive a fax without a fax machine, you can use the free Fax2Email function. You can activate the fax service in your customer account. You will need a SIP line and a separate telephone number for this.
Click on +Add and select the SIP line where the fax service is to be connected.

Email2Fax
To send a fax without a physical fax machine, you can use the free Email2Fax function. You activate the service directly in your peoplefone customer account. Sending a fax is charged per connection and minute to the destination number via the credit on your account. Depending on the size and duration, you will be charged CHF 0.03 per minute.
You can use this information to send a fax via your e-mail program.

Open a new e-mail and make sure that the sender corresponds to the specified e-mail address.
Fill in the following fields:
To: Enter the fax number followed by :
@p-fax.com for peoplefone Switzerland
@p-fax.de for peoplefone Germany
@p-fax.at for peoplefone Austria
@p-fax.fr for peoplefone Frankreich
Several numbers can also be controlled simultaneously (you can have several receivers).
- 0445521234@p-fax.com;
- 0215521234@p-fax.com;
- 004912345678@p-fax.com;
Cc: / Bcc:
These fields are not taken into account.
Subject:
Enter the password that you can find in your peoplefone portal under Configuration → peoplefone FAX.
Text and appendix:
You can now write an e-mail and attach the PDF files to be faxed. You can send multiple attachments. However, the limit is max. 20 megabytes per file and max. 30 megabytes per e-mail.
Send:
You will receive a confirmation e-mail of the FAX transmission with the recipient’s number, the day and time as well as a PDF with the sent file(s) as an attachment.e-mail.
Note:
The time required depends on the transmission time.
Physical fax
If you want to operate a physical fax, you must work with a VoIP adapter. peoplefone no longer issues adapters. End customers or installation partners can integrate any adapter with the SIP credentials and configure it as required.
Support and EoL
The devices are EoL (End of Live) and are no longer supported by peoplefone.
- Patton SN200 (EoL)
- Cisco SPA122 (EoL)
Troubleshooting und Fehler
What are the most common FAX errors?
- Make sure that the e-mail address and password match those of the fax user created in your peoplefone customer account.
- Also make sure that the fax number is written correctly in the e-mail (with the note @ p-fax.de). For example 071118420499@p-fax.de.
- Also pay attention to unwanted spaces.
- The fax number entered may not be a fax number.
- The fax number may be blocked or unavailable.
- You do not have enough credit on your peoplefone account.
- The e-mail or PDF files are too large.
Telefonie VoIP
Click on the respective menu item to view the respective area.


Lines / Users

It is now possible to have the SIP TRUNK and peoplefone HOSTED products in the same account. It can therefore be mixed if necessary.
In the menu under Lines / Users you will find an overview of all SIP lines. If you want to add another SIP line, click on + Add user / SIP line.

The line can be named and configured according to requirements. Here is some information on the different areas of the line.
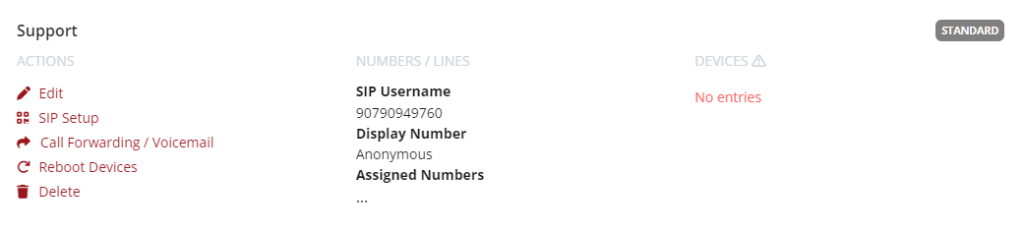
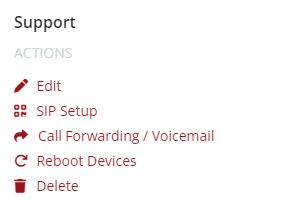
- Under Edit you can make different settings, depending on whether you are using an individual device, HOSTED or your own telephone system on the line.
- The SIP setup provides you with the necessary SIP credentials for commissioning.
- If a forwarding is to be made from the line, you can configure this here.
- Reboot Device, the YEALINK and SNOM devices that support this function can be rebooted.
- Delete refers to the deletion of the line
- Standard means that it is a normal standard or TRUNK line.
- If the status is set to no entries, this means that no device has registered on the line. This means that peoplefone cannot deliver the call. Please note that the status is adjusted with a time delay when logging in.
ATTENTION:
Internal speed dial numbers such as ex. for CH: 112, 117, 118, 144, are not permitted, as these could be national or international emergency numbers! peoplefone recommends that number ranges for three-digit internal extensions always begin with 2xx. The reason for this is that international emergency numbers usually have three digits and start with 1xx.
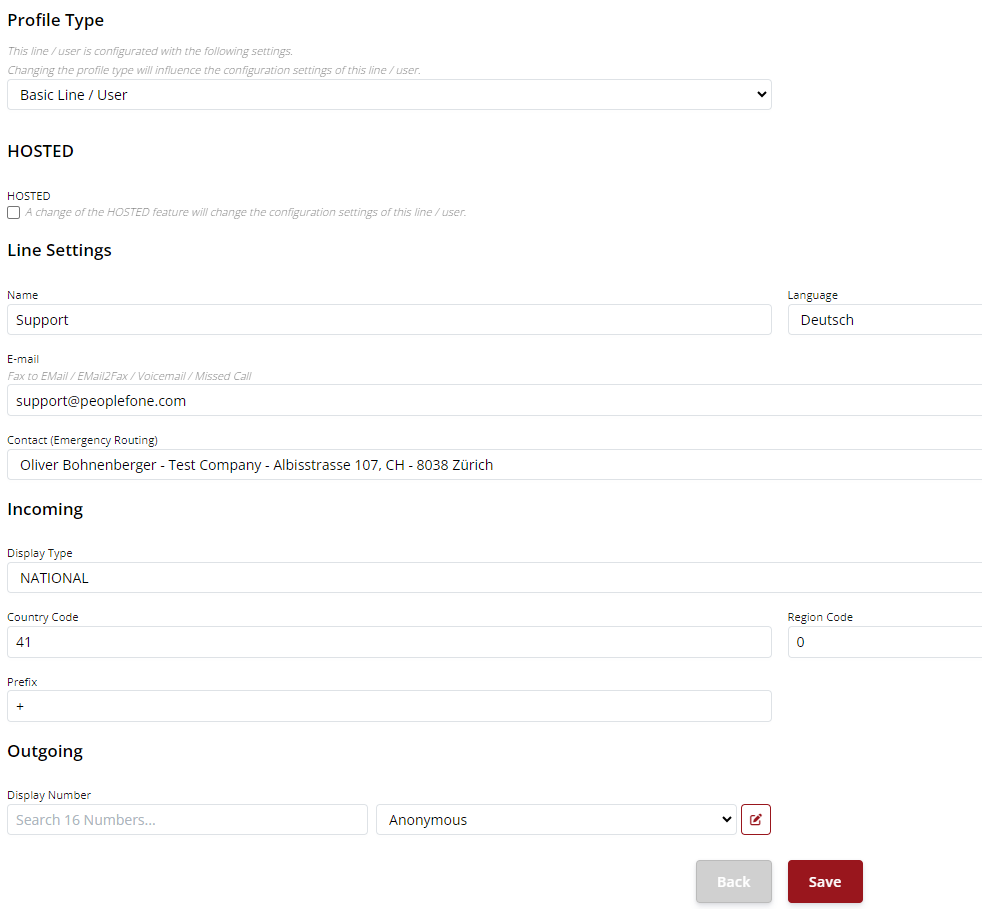
Edit line
When you edit the line, you can make various settings. The profiles should help you to select the right line settings.
- Line profiles (user as basis, SIP-TRUNK, 3CX, Rainbow Hub, Swix)
- Basis is for a line with a softphone, a device or for the configuration of an app.
- If you are installing a telephone system and require the SIP-TRUNK function, select this profile.
- If you are installing a 3CX system.
- When you put a Rainbow Hub system into operation.
- If you install a Swyx.
SIP Setup / SIP Credentials
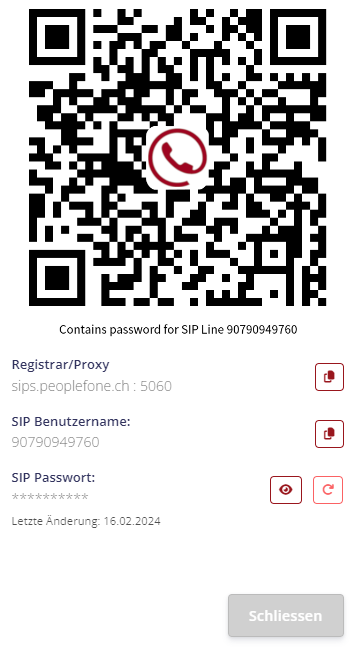
The SIP Setup / SIP Credentials can be used to read out the SIP credentials. Each SIP line has its own SIP user name and password. The proxy usually always remains the same. To display the password, click on the eye. You can also generate a new password if necessary. With the QR code you can integrate the peoplefone APP with little effort.
ATTENTION:
If the password is changed on the line, it must also be changed on the phone. If only the SIP password of the line is changed, the device can no longer connect to the line.
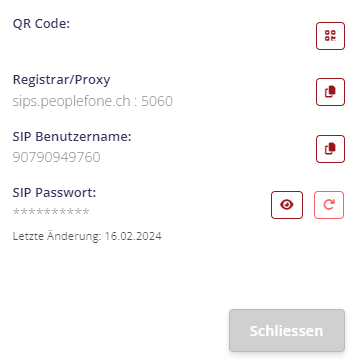
QR Code
Forwarding / Voicemail
Standard forwarding is generally used by end customers who have configured an end device directly to a SIP line and want to forward it to a specific destination. You can easily and conveniently activate standard forwarding on your number in your customer account at any time. A forwarding line, for example to a cell phone, incurs call charges and is billed at peoplefone’s normal rates per minute.
ATTENTION: Make sure that you have sufficient funds in your account.
There are four areas for forwarding: Add forwarding, voicemail settings, voicemail greeting and voicemail messages.
Voicebox settings
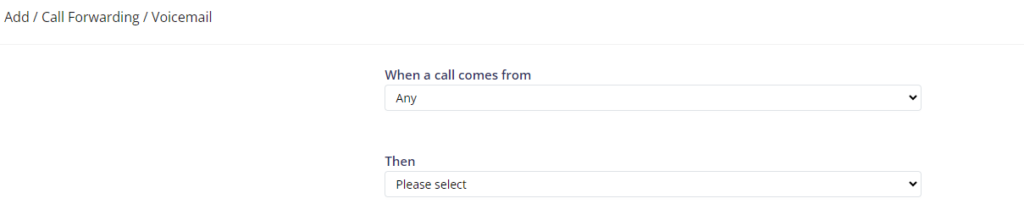
Set up forwarding
Specify the role to which the forwarding should be made. To set up a forwarding, click on + Add

You have the choice of the following rules (Immediate, Busy, Offline, No answer after X seconds).
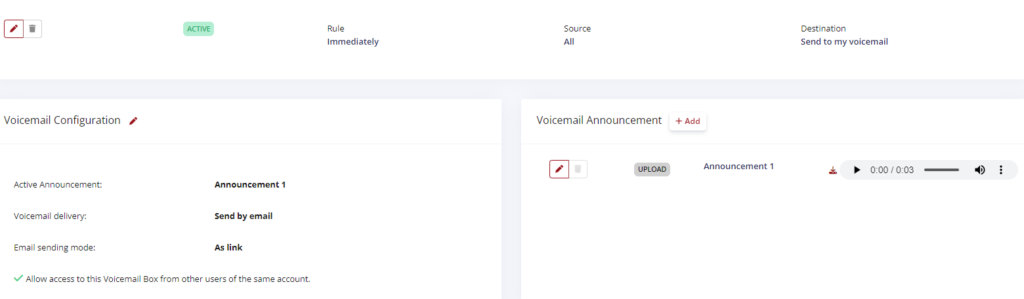
Voicemail announcement
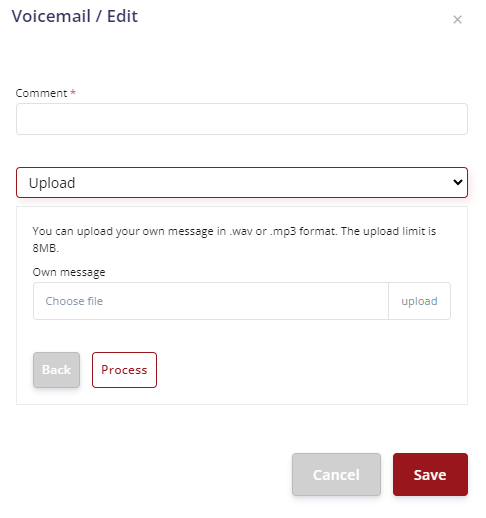
You can upload your own file. Click on +Add to add a new greeting. You can store several different greetings and, if required, select them under Active voicemail greeting.
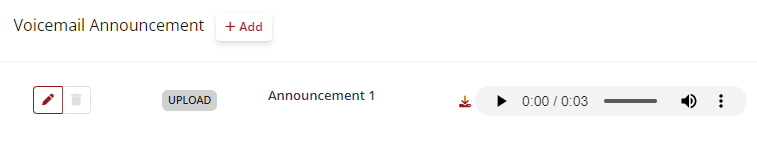
Give the file to be uploaded a name, select the file and upload it.
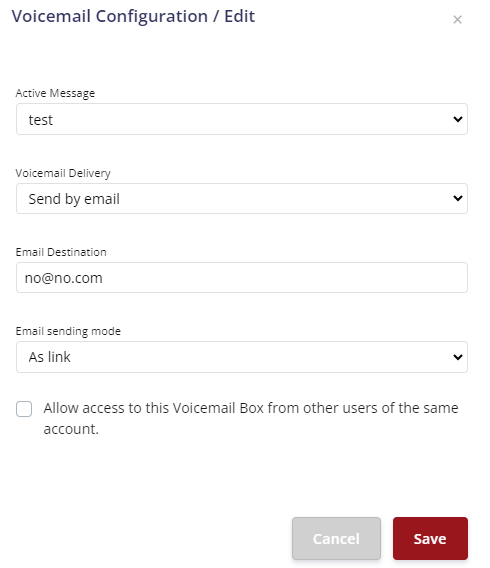
Voicebox settings
If you have uploaded several greetings, you can select a desired greeting under Standard greeting and have it played. When the voice message is delivered, you can simply have it sent to you by e-mail. You can also have the message sent to you and saved in the peoplefone system. Please ensure that you clean up the messages stored online beforehand (max. 20 messages).
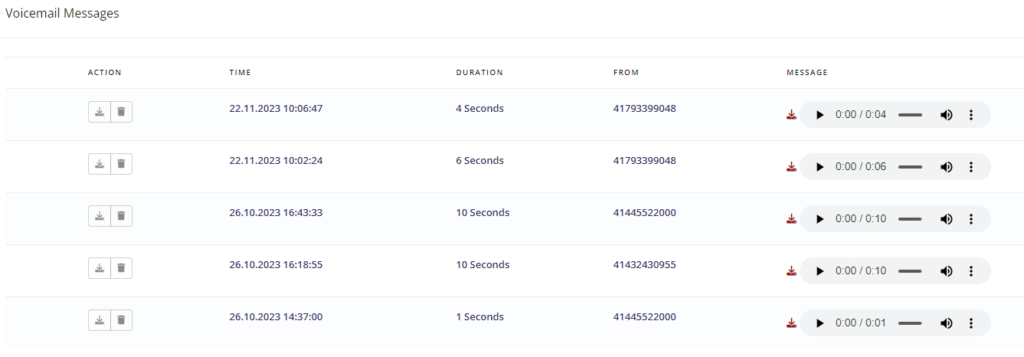
Voicemail notifications
You can manage your voicemail via the customer account, such as downloading, deleting and listening to messages. A maximum of 20 messages can be stored in the system. The messages must then be deleted manually. The system does not overwrite existing messages. If the storage space is full, the caller can no longer leave messages.
Forwarding fallback SIP line / SIP-TRUNK

With a fallback, you can set up a fail-safe feature for the telephone system. If, for any reason, the customer’s Internet fails and the system or the telephone can no longer register with peoplefone, the status on the SIP line will go offline after the re-register time (recommended 180 seconds) has expired. This is also the trigger that the forwardings stored in the system start to be pulled when offline. You have the option of forwarding individual numbers to different destinations or entire blocks.
A maximum of 300 forwardings can be defined per SIP line. peoplefone recommends setting up fallback forwardings according to a concept and keeping the setup as simple and transparent as possible.
Click on Forwarding / Voicemail.
Add a role, click on +Add.

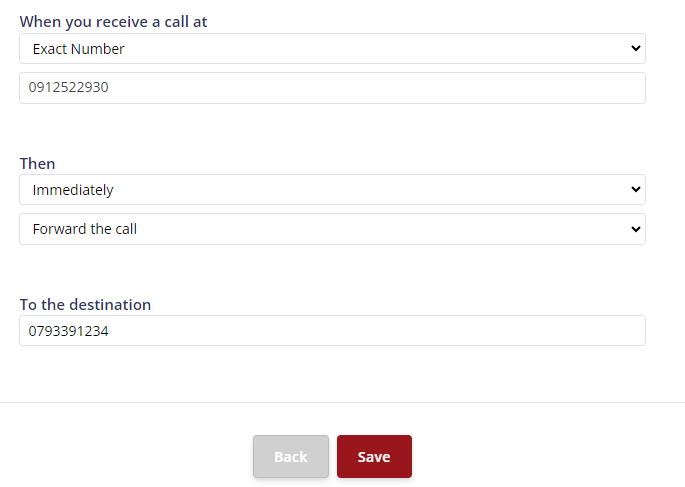
To configure a fallback, it makes sense to define a role, if offline then to a target. For an incoming call, use the following parameters (Any, Exact, Prefix) to define what must happen. Select the number to which the fallback should be switched, e.g: (Support etc.). Define when the action must be triggered (Immediately, Busy, When offline, After X seconds). Specify the destination to which the fallback should be routed.
Numbers
Edit number blocks
In the numbers area, you as the end customer can assign an entire number block to a line or individual numbers to different lines. Once the number has been assigned, incoming calls are routed to the corresponding SIP line.
- Use the pen tool to assign individual phone numbers.
- Use the chain symbol to assign an entire number block.
- The other symbols shown here are used internally.

Assign numbers
Here you can see that each number can be assigned individually to a SIP line.

Devices

In principle, all VoIP-capable devices can be configured manually with peoplefone. Support and functionality are only guaranteed for provisioned devices (auto-configured devices).
The SIP data is generated separately for each SIP line and does not correspond to the access data of the customer account.
Manual configuration
Configure VoIP devices manually: Manual configuration of VoIP devices
Block list

Depending on your requirements, you can choose between incoming calls or outgoing calls to be blocked.

Restrictions for incoming calls
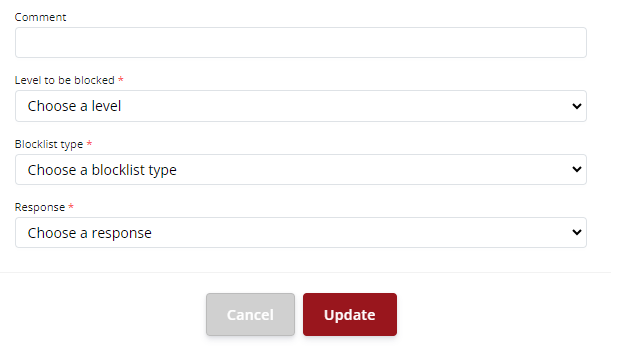
The incoming blocklist can be defined for the entire account, a specific SIP line or a specific telephone number. After selecting the area to be blocked, you can either block a telephone number, an area code or all anonymous incoming calls. You can then decide whether the caller hears the message “Number not available” or the busy signal.
ATTENTION:
The number of rules is limited, you can have a maximum of 200 entries in the system. You can customize the incoming blocklist under Blocklist in your customer portal according to your needs.
Locking options
Entire account = The rule applies to the entire account.
SIP line = You can specify the SIP line where the rule should apply.
peoplefone number = You can block a specific number.
Type of blacklists
Exact number = Here you can select whether an entire number or only part of it should be blocked.
Area code = Select a regional or country code here. Example: 044, 079, 0049 etc.
Anonymous = If you select Anonymous, all anonymous incoming calls are blocked.
You can also block individual numbers or entire area codes. In this example, we are blocking a specific number.
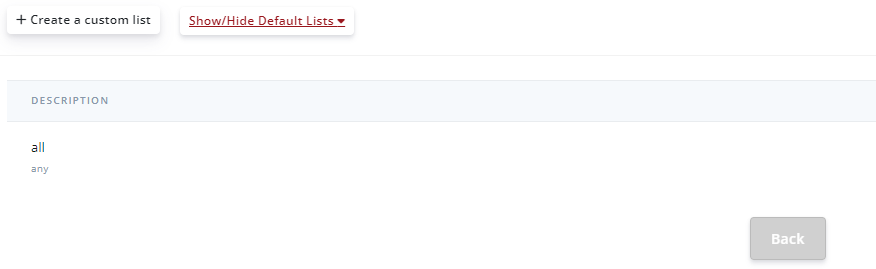
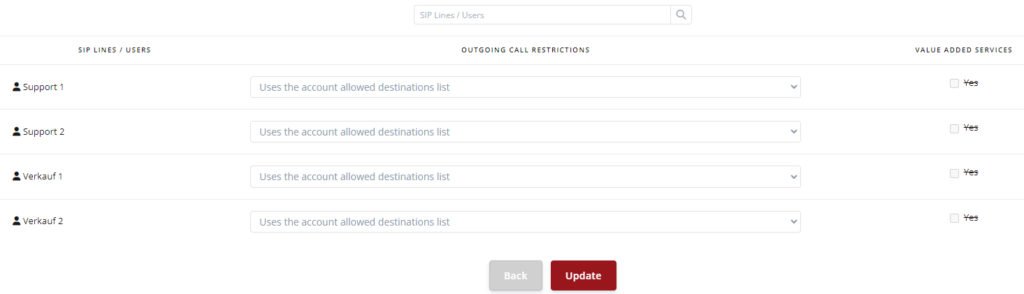
Restrictions for outgoing calls
You can also block outgoing calls by adding a new call restriction. This blocking has been implemented to protect that if a system, device etc. is hacked, no calls can be made to these destinations.
Click on my call restriction lists.

Click on Create a custom list.
ATTENTION:
Countries that you have selected are released and calls can be made to these destinations.
Give the list a name and define the countries that may be reached.
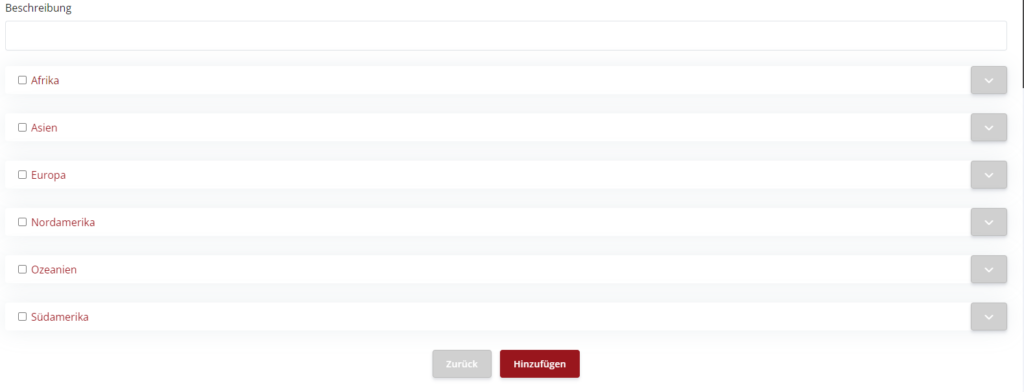
Under SIP Lines / Users, you can store individual lists on different lines.
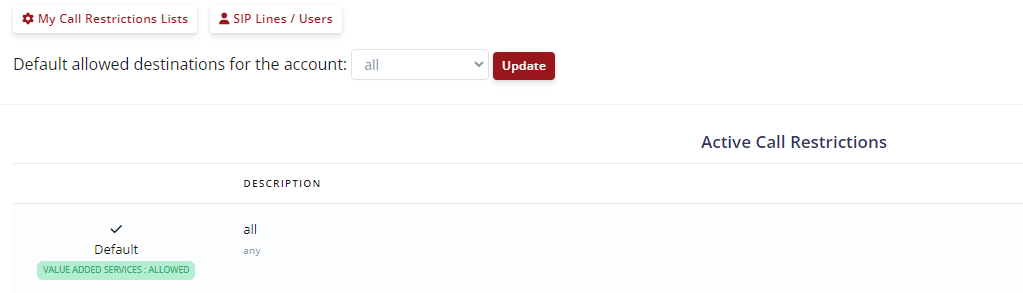
Can be stored per line or another list. You can allow or block these under value-added services.
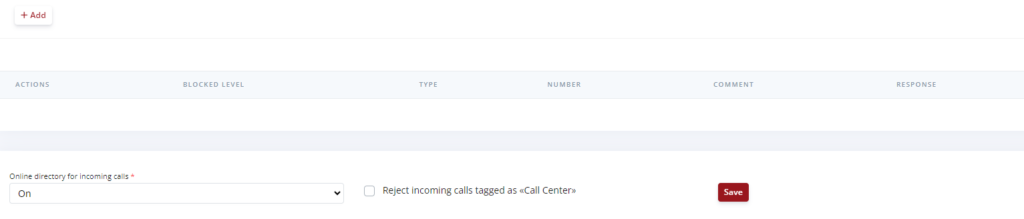
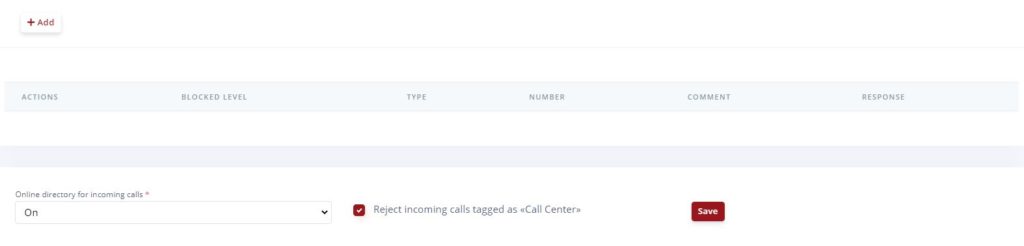
Reject call center calls
You can automatically block incoming calls that have been marked as call centers at tel.seach.ch. The online directory can also be switched on or off here.
To add a role, click on +Add.
API


Overview
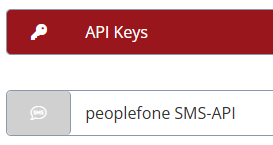
API Key

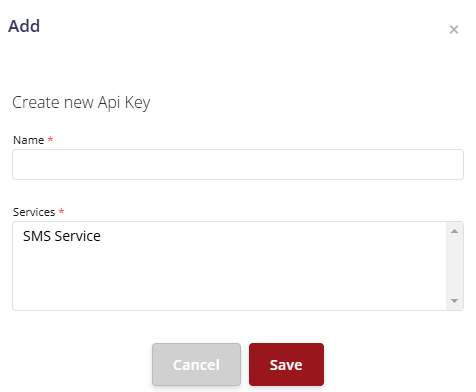
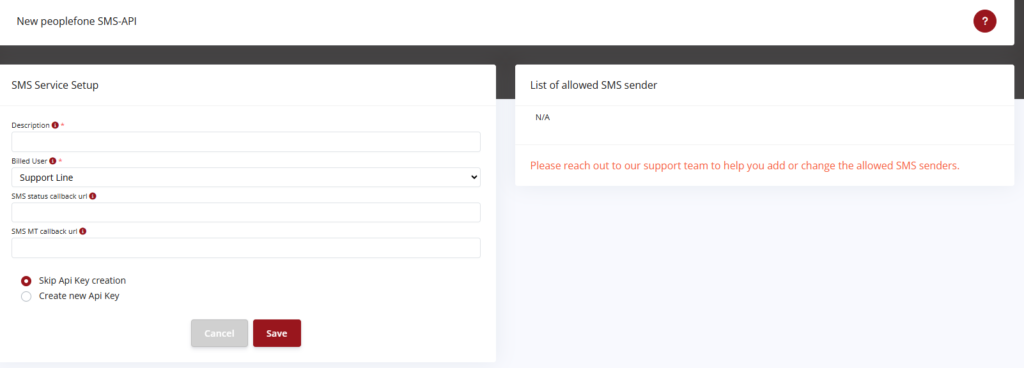
SMS Service

Administration
Cancel postpaid account
What do I have to do to cancel my postpaid account?
If you have concluded a peoplefone Business contract with monthly invoices, you have a notice period of 3 months. The monthly subscription costs will be invoiced at the end of the month until the end of the notice period. Cancellation must be made in writing by the end of the month.
If you would like to permanently delete your peoplefone account, please write to us at support@peoplefone.ch
Cancel prepaid account
How do I cancel my prepaid account?
You don’t have to do anything to cancel your account, accounts are automatically purged after approximately one year in accordance with our GTC. You can use up your credit and then simply leave the account empty. Nevertheless, you will receive reminders about the expiry of subscriptions, which you can ignore.
Credit balance refund
Will credit once paid in be refunded?
According to our GTC, once a credit has been paid, it will not be refunded. If, for example, a telephone number has been paid for in advance and is not used before the expiration date, this credit will not be refunded. If you have any questions, please contact our accounting department at finance@peoplefone.ch
Password forgotten
What do I do if I have forgotten my password?
To log in to your peoplefone account, you need your login e-mail and your own password. If you no longer know your password, you can reset your password yourself using the forgotten password function. We will send you a notification to your login e-mail address with a link to reset your password. Please follow the instructions in the notification.
Go to the peoplefone website. Click on Forgot password, we will send an e-mail to your login e-mail address. If you do not receive this e-mail, please check your SPAM / junk folder.

Buy credit?
How can I buy credit? The procedure is described in detail here: Buy credit.
Change address?
Go to Profile in your peoplefone account. You can change the address, login e-mail address and password at any time.
How do I change the login e-mail
You can find out how to change the login e-mail address here: Access rights
Transfer account?
Can I give up a phone number and transfer it to someone else? Yes, you can fill out the form for the change of holder, sign it and send it back to us by e-mail. You can find the form in your Contracts / Documents account
Transfer phone numbers?
Kann ich eine Rufnummer abgeben und jemanden anderen übertragen? Ja, bitte benutzen Sie dafür das Formular „Interne Portierung“. Und senden Sie dieses unterschrieben uns per E-Mail zurück. Das Formular finden Sie in Ihrem Konto unter Verträge / Dokumente.
Transfer existing credit?
Can I transfer existing credit to another customer account? Yes, you can send us an e-mail asking us to transfer the credit from account A to account B.