Requirements
- A peoplefone Account (Registration)
- SIP Data
Installation with peoplefone HOSTED

This document is not intended for end users, but for installers who have knowledge of networks
xtelsio is a tool for adding CTI functions to HOSTED pbx of peoplefone:
- Composition from the PC (click to dial)
- Handling the call (answer, hold, transfer, etc.)
- Integration with other software (CRM, Website, etc …)
- Searches in different databases (Outlook, Lotus Notes, Access DB, etc…)
You can download a free “30 days” version on the xtelsio website.
In the configuration presented, xtelsio will be configured to connect directly to the phone to be administered. Some phones are not compatible and do not all offer the same functions, you will find more information on the xtelsio site.
Currently, the phones supported by xtelsio are:
- Snom 300, 320, 360, 710, 720, 760, 821, 870
- Yealink T22P, T26P, T28P, T32G, T38G, T42G, T46G, T48G
- Mitel/Aastra 6737i, 6753i, 6755i, 6757i, 6739i, 68xxi
Peoplefone recommends that you use Snom 7xx telephones or Yealink T4x series because these two series are supported by peoplefone provisioning for peoplefone HOSTED.
Installation and configuration
This installation was carried out under Windows 10 and xtelsio v3x.
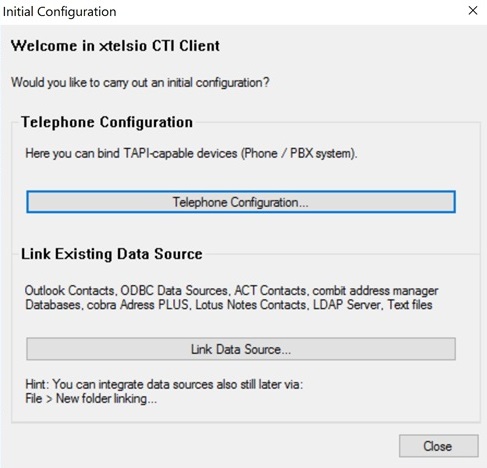
Once the installation is complete you should have a window at the first startup of xtelsio, prompting you to configure two essential parameters:
- The link with the phone. (In our example a Snom 760)
- The data source. (In our Outlook example)

Configuration of the phone
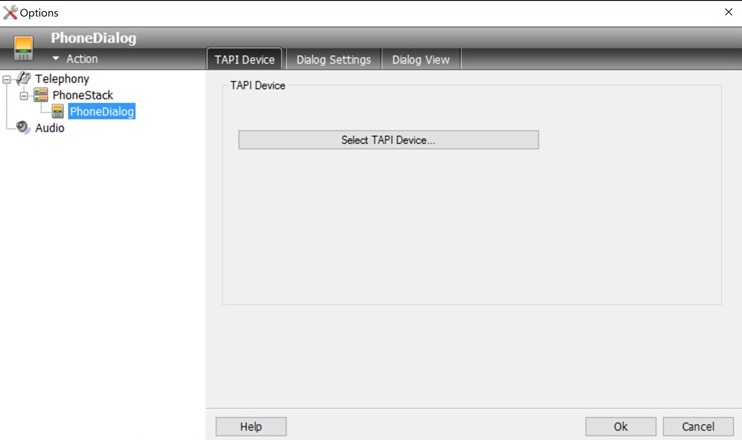
- After you click on Telephone Configuration, you will have this window, here you have to click on “Select TAPI Device”
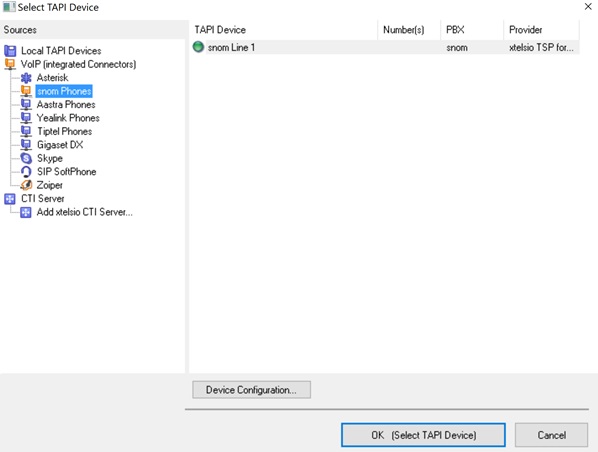
- Select the phone type, in our case Snom, select the line and click OK.
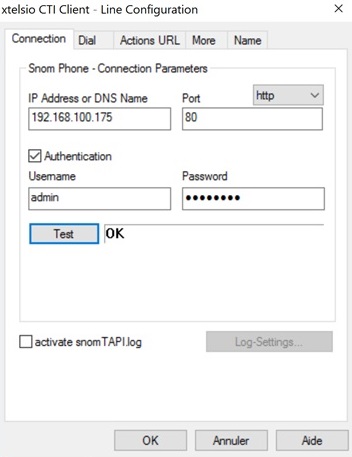
- In the next window, you must enter the IP address of the phone or its domain name.
- If you choose to use the IP address of the phone, it must not change over time, so you must either set up fixed IPs or make an IP reservation in the configuration of your DHCP server.
- Regarding the password, in case you have provisioned your phone, this is the SIP password of the 1st line configured for this device.
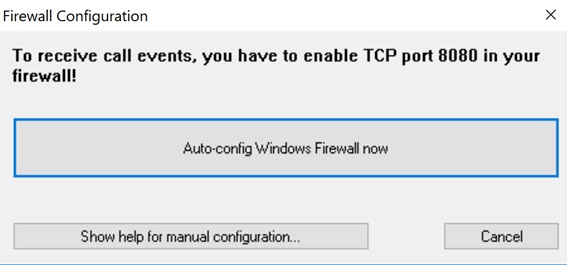
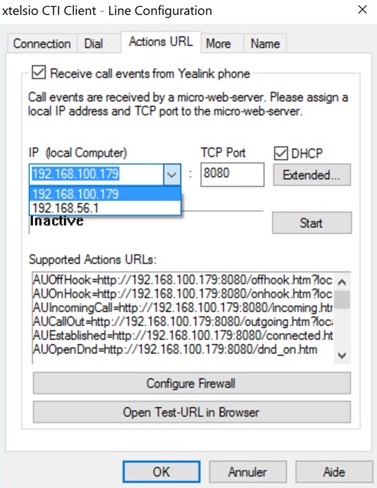
- xtelsio will then propose to configure Windows firewall for you
- If you have several interfaces (cable, wifi, vpn, virtual interface, etc …) on your computer, you must select the IP on which you want to receive information from your phone!
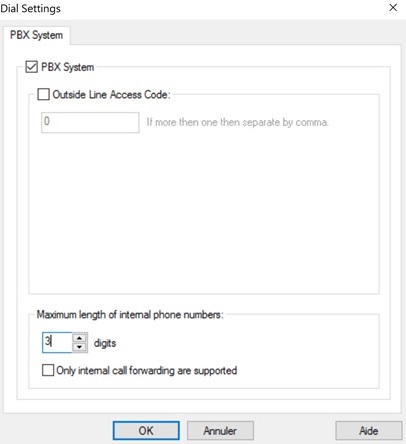
- For dialing, you need to delete the prefix for line access and configure the number of digits of your internal numbers. (Normally 2 or 3 digits)
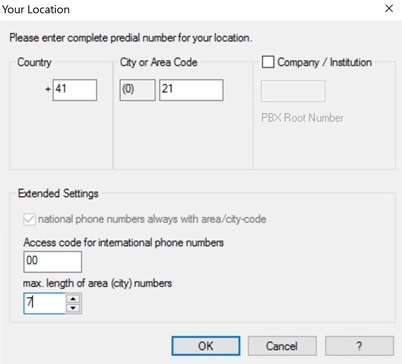
- Finally, configure your regional prefix.
- The configuration of the phone must be completed and you should return to the basic page of the wizard in order to be able to configure the data source.
Configuring the data source
This data source is used at different locations including:
- When receiving a call. (For displaying the caller’s coordinates)
- For contact search when composing from xtelsio.
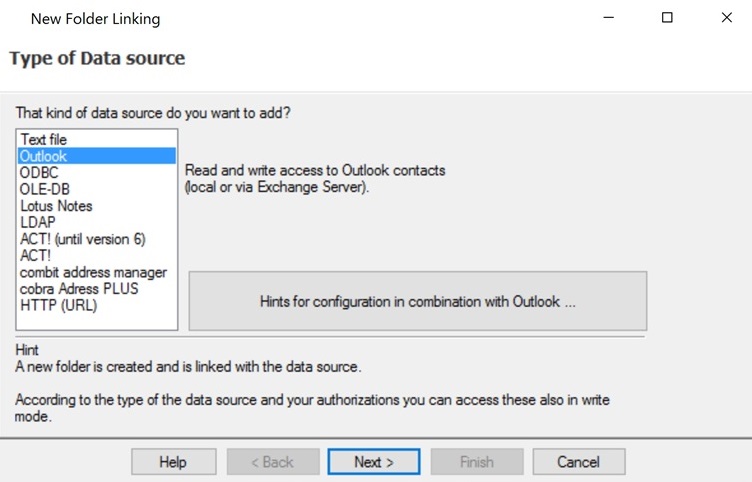
- On the first page you will have to choose the type of source. (In our case Outlook)
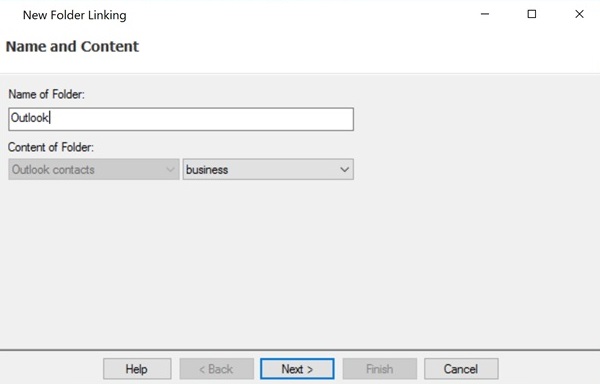
- In the second window you will have to choose the name of your new directory.
- In xtelsio, you will find the contents of this data source in this directory.
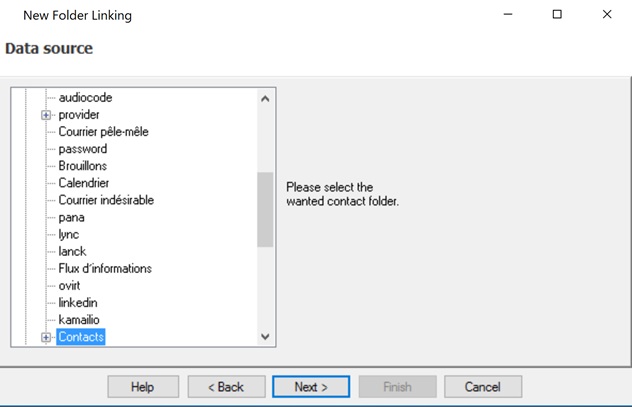
- And finally, choose the Outlook directory where your contacts are.
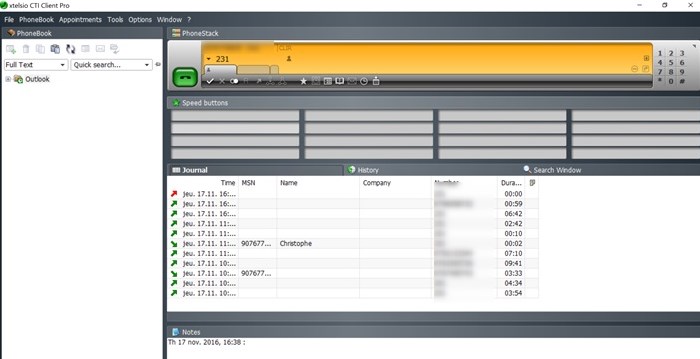
- After you complete the setup of the phone and data source, your xtelsio should look like this.
- At this point you should be able to dial your first call.
- Some devices, such as Yealink, will ask you to allow the remote control for the 1st time, you must accept it on the phone.
Adding speed dial
- To configure them, go to the “options” menu then “speed buttons” and select the 1st key list.
- Configure the name and number as in the example.
Configuration of click to dial
In addition to speed dials and data source contacts, xtelsio offers 3 other ways to automatically dial:
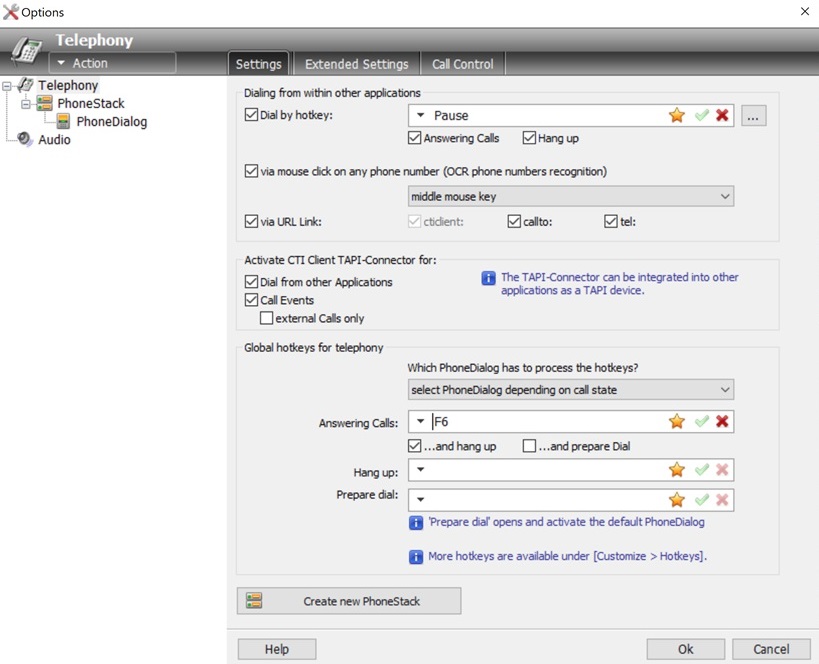
- Highlighting the number and dialing via hotkey (The pause key is configured)
- If a number is detected and recognized, click on it with the mouse (the middle key is configured)
- Click on a URL (cticlient, callto, tel)

- To configure and activate these options, you must go to the “Options” menu and then “Telephony”
Integration with other software
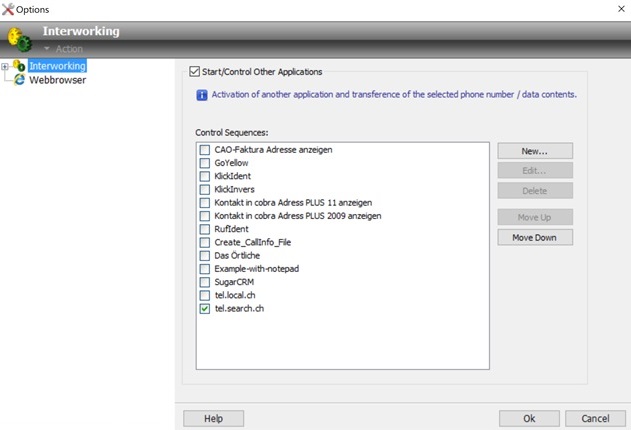


During an incoming call, you can transfer the caller’s number to an external application. (Web page or local software)
In a first step, you must configure the link with the application, go to the menu “options” then to “Interworking”.
You must activate the service and choose the application you want to configure, in our case tel.search.ch.
Then in an incoming call, if you want to transmit the caller’s number to a request, you can click by clicking on the button.
Debug
If you experience a connection problem between your computer and your phone:
- Check the IP address of the phone configured in xtelsio.
- Check the username and / or password of the phone.
- Check the configuration of your local firewall.
- If you installed the phones and computers on different networks/vlan, check the configuration of your router/firewall.
- If the phone/PC link was functional and after a certain time your xtelsio tells you not to detect the phone, it is possible that your phone has changed IP. In this case, correct the configuration of this one.
- If the link is established but the phone does not execute the commands, reboot the phone and try to initiate a call, see if the phone asks to allow remote control.
- If you can make a call but do not receive incoming call notifications, check if you have multiple IPs on your computer and which IP you have configured to receive notifications.
In the proposed configuration, xtelsio connects directly to your phone without going through the peoplefone servers. In case you fail to establish the phone and PC link, you probably have a local problem that peoplefone support will not be able to handle.
Other Information
This document presents only some basic functions but xtelsio supports many phones, data sources and provides many other options and functions. If you have any questions about how to configure or use them, you can find help using the “Help” button in each menu.
We remind you that a free version for 30 days is available, this will allow you to test and verify that this software meets your needs or those of your customers.
Finally, peoplefone has only tested some basic functions provided by xtelsio, if you have questions about this product, including integration with Outlook or other data sources, integrating xtelsio with your CRM or the many other functions offered, we recommend that you contact your xtelsio dealer because our support will unfortunately not be able to help you with these matters.