How-to configure direct routing
Set up of the domain, step 1
- During the onboarding process, peoplefone will assign you a specific domain that must be configured in your O365 account.
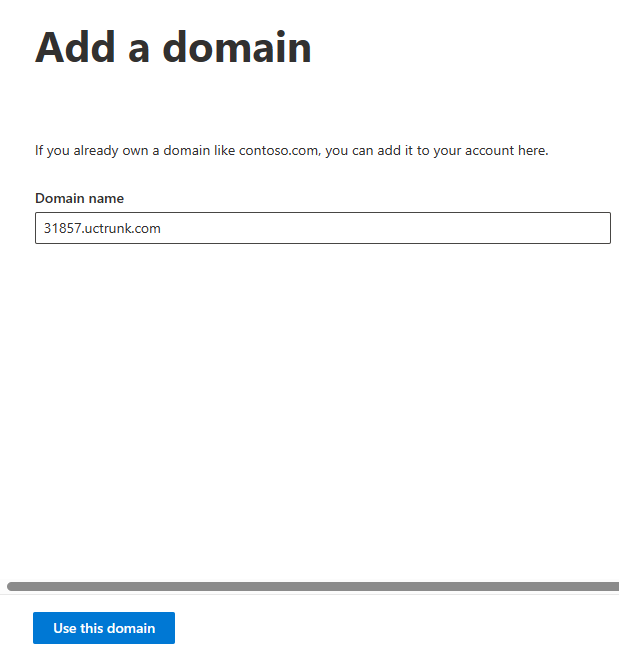
To configure them, go to your O365 portal, select on the left menu Setup → Domain and select Add domain
- Enter the domain that you received from peoplefone (in this example 31857.uctrunk.com)
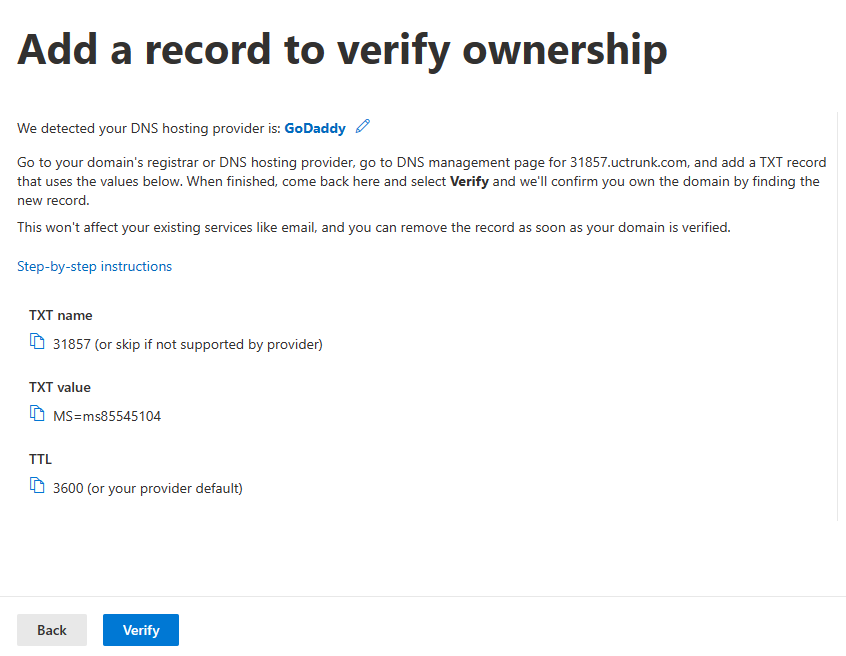
- Select “Add a TXT record instead”

- Copy-paste this screen and send it back to peoplefone so they can setup the validation
Set up of the domain, step 2
- When you receive the confirmation that the TXT verification is ready from peoplefone, you must go back to this domain set up and start the verification process.
- After that you must select “Skip and do this later” as no further services must be activated for the domain.
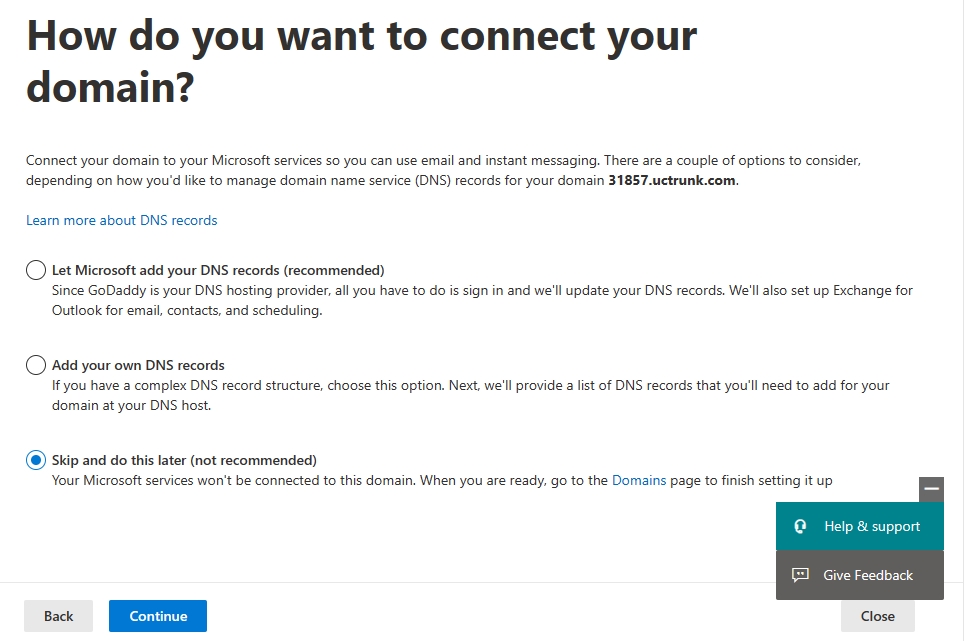
- The domain should now be ready
Activation of the domain
Once the domain setup is complete, you need to activate it in the next step.
This requires a user who has the Teams Admin role and a license with Teams as a product.
If you don’t have such an administrator, you can add a “dummy” user to that particular domain.
When the setup is complete, you can delete this “dummy” user.
IMPORTANT: This user must have been assigned the Teams Admin role or be a Global Administrator and have a Teams license.
The exact specifications for the administrator can be found in the Teams documentation from Microsoft:
https://learn.microsoft.com/en-us/microsoftteams/using-admin-roles
Example “Dummy” user creation

Select Teams Administrator or Global Administrator

Direct Routing Configuration
Please note, that enabling the rules you configure on Microsoft’s side can take up to 72 hours.
This How-To covers the setup for a simple solution where only Teams is enabled as communication solution in your O365 account.
If you have or plan to have a hybrid solution with Teams and Skype for Business online or Skype, then you will need to select more parameters.
More information on:
https://docs.microsoft.com/en-us/microsoftteams/direct-routing-plan
https://docs.microsoft.com/en-us/microsoftteams/direct-routing-configure
Before starting this setup, verify that you have received the following information from peoplefone:
sbc_port
sbc_domain
sbc_nb_channels (voice channels)
In the following setup, we will use as example: (it is possible that the sbc_port is the same)
sbc_port: 6000
sbc_domain: 31857.uctrunk.com
Setup the Direct Routing, Voice Routing Policies and User in the Teams Admin dashboard
For this setup you will need to login to your Teams Admin dashboard: https://admin.teams.microsoft.com/
Assign DDI to each user with these instructions:
- Go to Users -> Manage users.
- Select a user.
- Under Account -> Assigned phone number, select Edit.
- In the sidebar Assign phone number, in the Phone number type drop-down menu, select Direct Routing.
- Enter an assigned phone number and a phone number extension if applicable.
- Select Apply.
Configure the SBC:
- In the left navigation, go to Voice > Direct Routing, and then click the SBCs tab.
- Click Add.
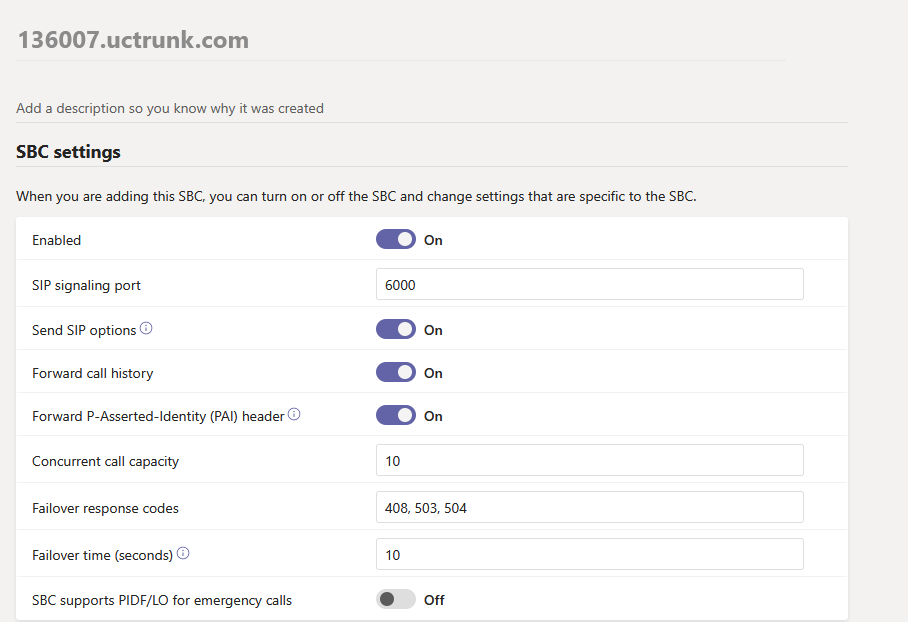
- Enter your “xxxxx.uctrunk.com” FQDN for the SBC.
- Configure the following settings for the SBC, Port->6000, Forward Call History->On, Forward PAI Header->On
For details on each of these settings, see Microsoft Documentation: https://learn.microsoft.com/en-us/microsoftteams/direct-routing-connect-the-sbc#sbc-settings - Set the Concurrent call capacity according the amount of channels you ordered
- When you’re done, click Save.
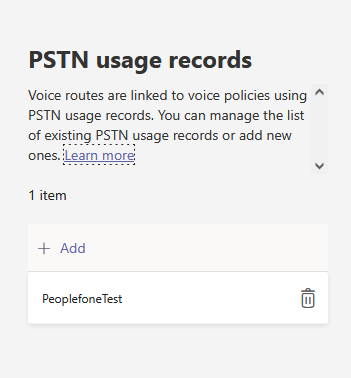
Create the PSTN Usage Record
- In the left navigation of the Microsoft Teams admin center, go to Voice > Direct Routing, and then in the upper-right corner, select Manage PSTN usage records.
- Click Add, type in a name, and then click Apply.
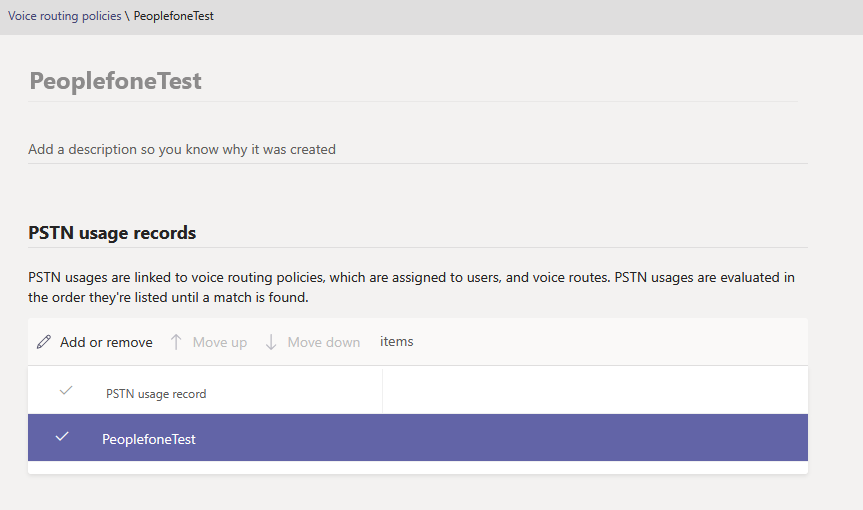
Create the VoIP routing policy
- In the left navigation, go to Voice > Voice Routing Policies
- Click Add.
- Give the Policy a name
- Click on Add PSTN usage… and select the PSTN Usage record and Click Apply
- Click Save
- After creating the Policy, you assign it to users to allow them to make outgoing calls
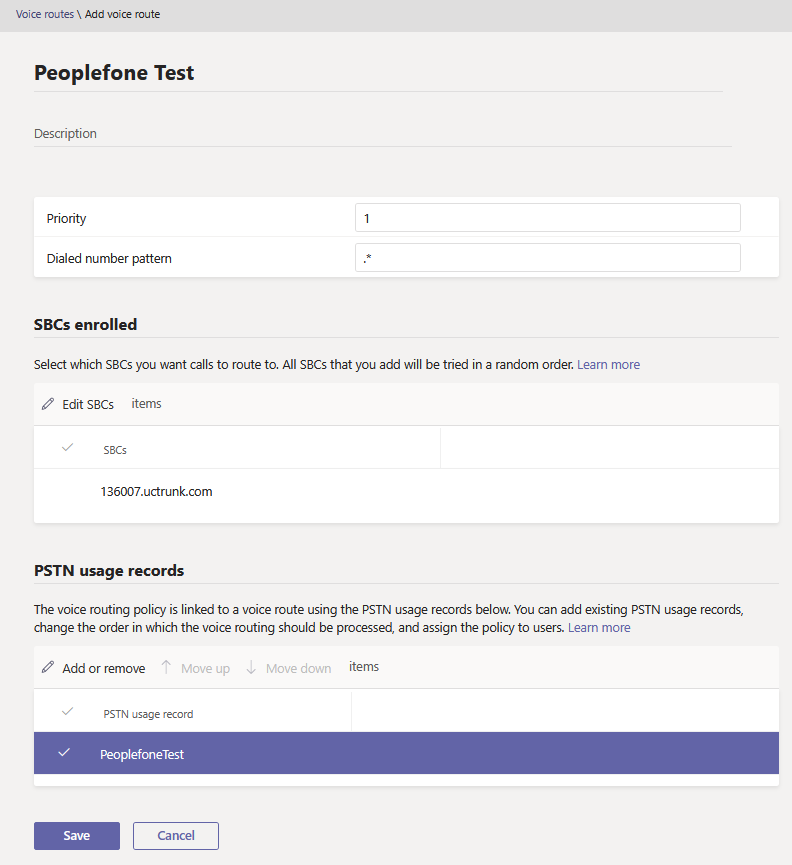
Create an online voice route:
- In the left navigation of the Microsoft Teams admin center, go to Voice > Direct Routing, and then select the Voice routes tab.
- Click Add, enter a name, and then add the description.
- Set the priority to 1, and then set the dialed number pattern to .*
- Under SBCs enrolled, click Add SBCs, select the Direct Routing Trunk then click Apply.
- Under PSTN usage records, click Add PSTN usage, select the PSTN usage record, and then click Apply.
- Click Save.
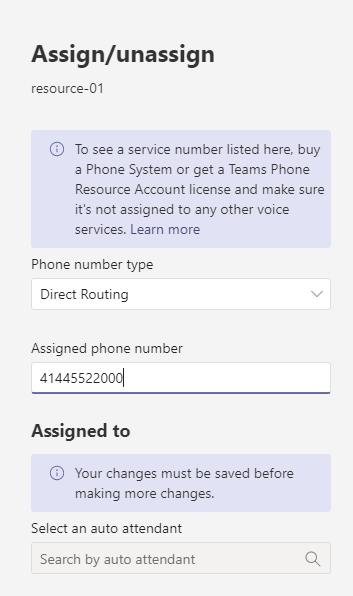
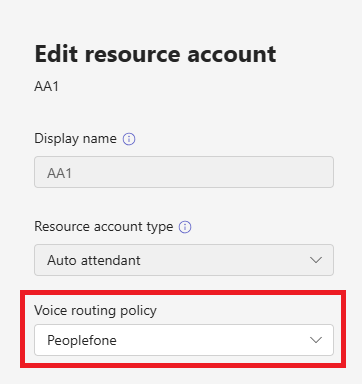
Setup Resource Accounts
- In the left navigation of the Microsoft Teams admin center, go to Voice > Resource accounts, and then click on Add
- Give the resource account a username and select whether it is for an Auto attendant or Call queue
- Select the resource account in the list and then click on Assign/unassign
- Select Direct Routing as the phone number type and then enter the phone number below like with the users
- You can now assign the Resource account to your call queue or auto attendant to route incoming calls to them
IMPORTANT: IF THIS AUTO ATTENDANT OR CALL QUEUE IS SET UP TO FORWARD TO EXTERNAL NUMBERS, THEN THE RESOURCE ACCOUNT MUST BE ASSIGNED THE VOICE ROUTING POLICY, JUST LIKE FOR A REGULAR USER
Other Information
How can a caller ID be used in your organization?
https://docs.microsoft.com/en-us/SkypeForBusiness/what-are-calling-plans-in-office-365/how-can-caller-id-be-used-in-your-organization
Setting the Caller ID for a user:
https://docs.microsoft.com/en-us/skypeforbusiness/what-are-calling-plans-in-office-365/set-the-caller-id-for-a-user
References
This How-To is based on the Microsoft documentation version published 27.06.2018 (GA)
You can find more info on the following links:
https://learn.microsoft.com/en-us/microsoftteams/using-admin-roles
https://learn.microsoft.com/en-us/microsoftteams/direct-routing-connect-the-sbc
https://learn.microsoft.com/en-us/microsoftteams/direct-routing-enable-users
https://learn.microsoft.com/en-us/microsoftteams/direct-routing-voice-routing