General Information
This manual doesn’t cover the installation of FreePBX. You can accomplish this either by installing the required packages on an existing system. Or by downloading the distribution of FreePBX here. You can start this guide once you have access to the FreePBX’s web interface. You also need to have VoIP clients, this can be physical phones or softphones. You also need a peoplefone account, you can register for free on our website. Buying a number may also be a wise choice, so that you can be reached from an external number. Without assigning a number to a line, people will have to call you via your SIP username.
Configuration environment
This guide was created with a FreePBX 32bits and 64bits Full Installation version 10.13.66 with Asterisk 11. The Asterisk 13 version is newer but has many problems (as of 12/09/2016), peoplefone therefore advises to use these versions only for testing purposes and not operational purposes.
For security reasons, peoplefone recommends using the FreePBX behind a firewall. Thus we have disabled the internal firewall of the FreePBX, disabled the NAT and assigned the public IP address. The FreePBX installation was done as follows:
- With a fixed internal IP address (IPv4)
- IPv6 was disabled
- Default network (local / 24)
- DNS (Google)
- Recommended firewall and network settings
Images STABLE FreePBX Linux 6.6 • Asterisk 11 ou 13
10.13.66-64bit / Release Date : 2016
10.13.66-32bit / Release Date : 2016
Basic configuration
General SIP Settings
FreePBX Webinterface → Settings → Asterisk SIP Settings → General SIP Settings
- Order of Codecs Audio alaw, ulaw, g722, g729

Chan SIP Settings
FreePBX Webinterface → Asterisk SIP Settings → Chan SIP Settings
- NAT sur no
- IP Configuration: Public IP

Trunk creation
FreePBX Webinterface → Connectivity → Trunks → Add Trunk
- Add a « SIP (chan_sip) trunk ».

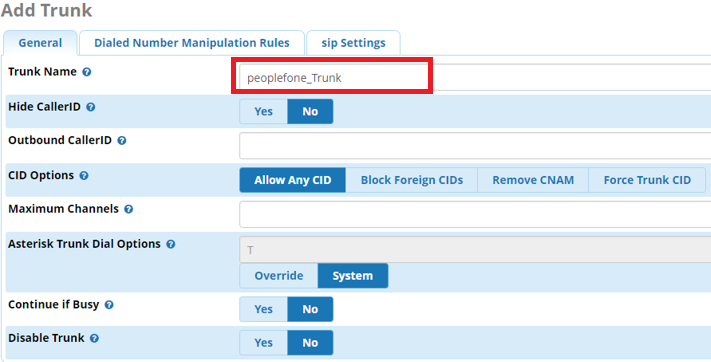
FreePBX Webinterface → Connectivity → Trunks → General
- You have to define the name of your Trunk
Trunk Dialed Number Manipulation Rules
FreePBX Webinterface → Connectivity → Trunks → Dialed Number Manipulation Rules
- For match pattern use «.»

Trunk SIP Settings Outgoing
FreePBX Webinterface → Connectivity → Trunks → SIP Settings → Outgoing
- Now you need to define the name of your TRUNK and specify the PEER details

- Specify the PEER details
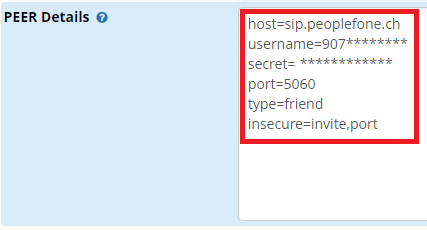
host=sips.peoplefone.ch
username=SIP Username
secret=SIP Passwort
port=5060
type=friend
insecure=invite,port
Trunk SIP Settings Incoming
FreePBX Webinterface → Connectivity → Trunk → SIP Settings → Incoming
- In User Context, you must enter the SIP username
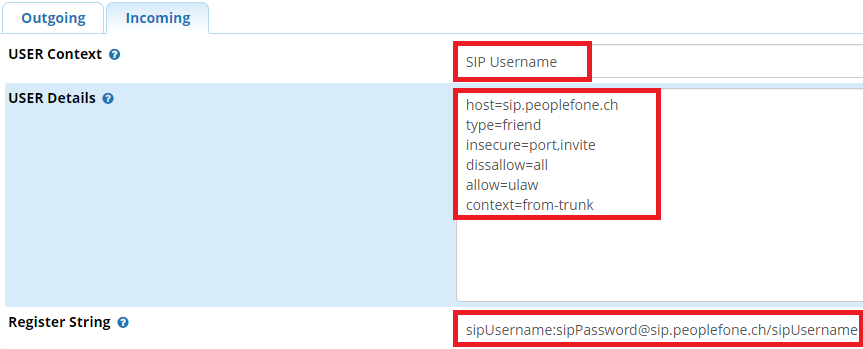
User Details:
host=sips.peoplefone.ch
type=friend
insecure=port,invite
dissallow=all
allow=ulaw
context=from-trunk
Register String:
sipUsername:[email protected]/sipUsername
Extensions
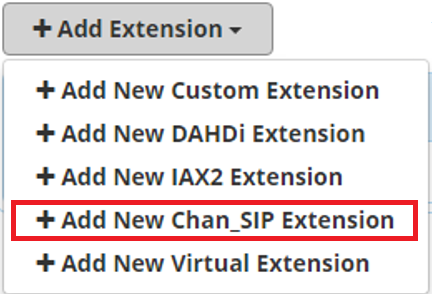
FreePBX Webinterface → Applications → Extensions → Add Extension
- Add a new Chan_SIP extension
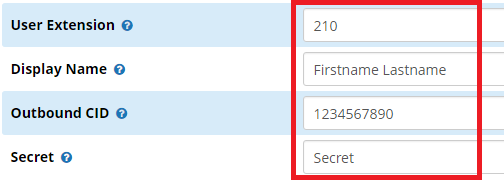
FreePBX Webinterface → Applications → Extensions → General
- Add user extension
- You need to set the display name in the Display Name
- Determine Outbound CID / Phone Number
- A password (Secret) is generated automatically for you, it is required for the configuration of the terminal (SNOM Web Interface) and to configure in the field password.
Inbound Route
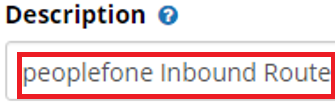
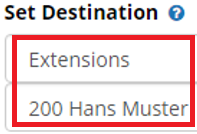
FreePBX Webinterface → Connectivity → Inbound Routes → General
- Add an Inbound route
- Define a name for the Inbound Route
- Determine the destination of the call.
Outbound Route
Setting outgoing routes
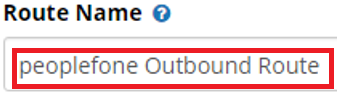
FreePBX Webinterface → Connectivity → Outbound Routes → Route Settings
- Define a name for Outbound route
Outbound Dial Patterns
FreePBX Webinterface → Connectivity → Outbound Routes → Dial Patterns
- For match pattern use «X.».

FreePBX Webinterface → Connectivity → Outbound Routes → Dial Patterns
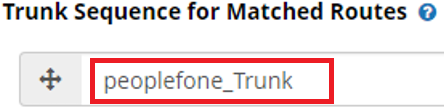
- Determine which Trunk the connection should be made with.
Configuration of the terminal
SNOM Webinterface
- Display name : You can configure the name that will be displayed on the device(s)
- Account : Configure the extension of the requested user
- Password : Use the automatically generated password “Secret”
- Registrar : Set the domain or IP address of your phone system, the port must also be filled
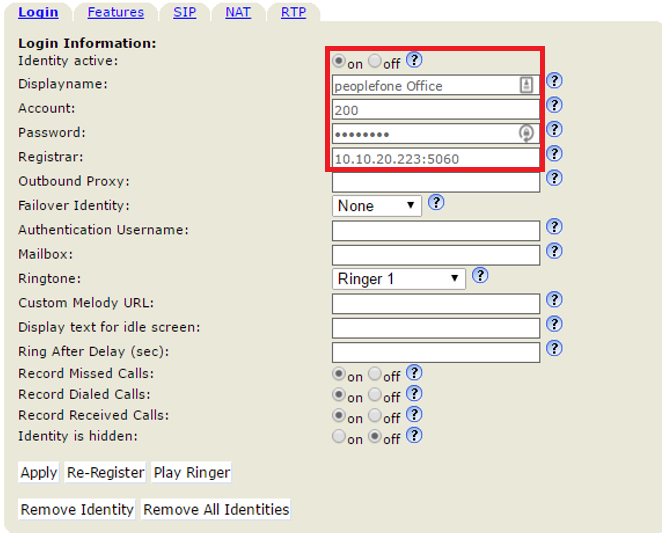
- Codec : Please fill in the codes in the following order: pcma, pcmu, g722, g729, telephone-event
- RTP Encryption : Not supported and must be disabled
