Allgemeine Informationen
In dieser Anleitung wird erläutert, wie Sie einen TRUNK und eine externe Personenanzahl am 3CX konfigurieren können. Dazu benötigen Sie Zugriff auf das Webinterface Ihres 3CX-Systems. Um Ihre Konfiguration testen zu können, sind zwei Telefone erforderlich, egal ob Sie VoIP-Clients oder Hardwaretelefone verwenden. Um eingehende Anrufe zu testen, benötigen Sie eine oder mehrere Zielnummern, die Sie entweder über Ihr Kundenkonto (nationale Nummern kaufen) oder durch Anforderung von Testnummern über den Support erhalten. Wenn ein System mit mehreren Nummern eingerichtet ist, muss peoplefone den SIP-Trunk aktivieren. Diese Verbindung kann per E-Mail angefordert werden. Mit dem Clip Open übergibt peoplefone die Steuerung der Signalisierung der “ausgehend” anrufe an die Telefonanlage. Um einen Missbrauch der Signalisierung zu verhindern, benötigen wir ein korrekt ausgefülltes und signiertes welches Sie in Ihrem Kundenkonto unter Verträge/Dokumente finden.
Sicherheitsmassnahmen – Basic
Basiseinstellung
Webinterface Management Konsole
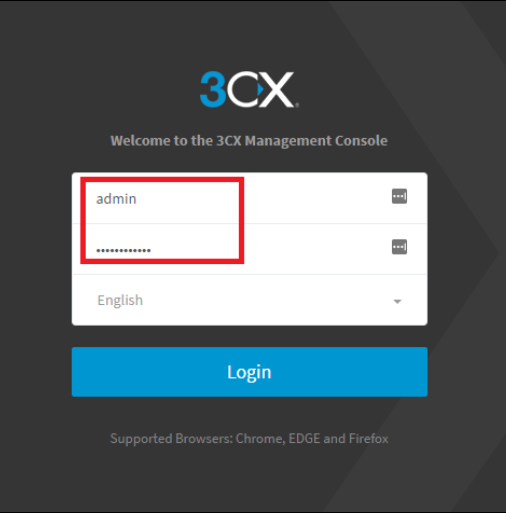
3CX-Webinterface → Grundkonfiguration → Erste Anmeldung
- Bei der Installation des 3CX-Systems müssen Sie einen Benutzernamen und ein Kennwort für das 3CX-System definieren
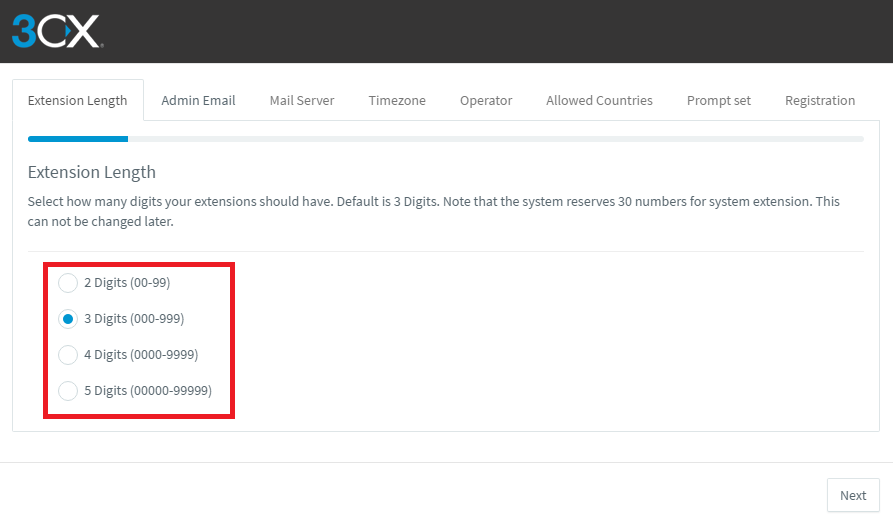
Anzahl Ziffern der Nebenstellen
3CX-Webinterface → Grundkonfiguration → Erweiterungslänge
- Legen Sie fest, mit wie vielen Ziffern Sie Ihr System einrichten möchten
- ACHTUNG: Dies kann nachträglich nicht mehr geändert werden!
Admin Email
3CX-Webinterface → Grundkonfiguration → Admin-E-Mail
- Geben Sie die E-Mail-Adresse des Administrators ein
Mail Server
3CX Webinterface → Grundkonfiguration → Mailserver
- Geben Sie die Mail-Server-Informationen an, damit das System Nachrichten senden kann
Zeitzone
3CX Webinterface → Grundkonfiguration → Zeitzone
- Stellen Sie den Standort der Telefonanlage ein
Operator
3CX-Webinterface → Grundkonfiguration → Operatorerweiterung
- Für die Erstinstallation wird eine Operatorerweiterung angelegt, füllen Sie die folgenden Felder aus
Zulässige Länder
3CX-Webinterface → Grundkonfiguration → Zulässige Länder
- Legen Sie fest, wohin die ausgehenden Anrufe gehen sollen
Eingabeaufforderung eingestellt
3CX-Webinterface → Grundkonfiguration → Eingabeaufforderung einstellen
- Konfigurieren Sie Ihre Standardsprache
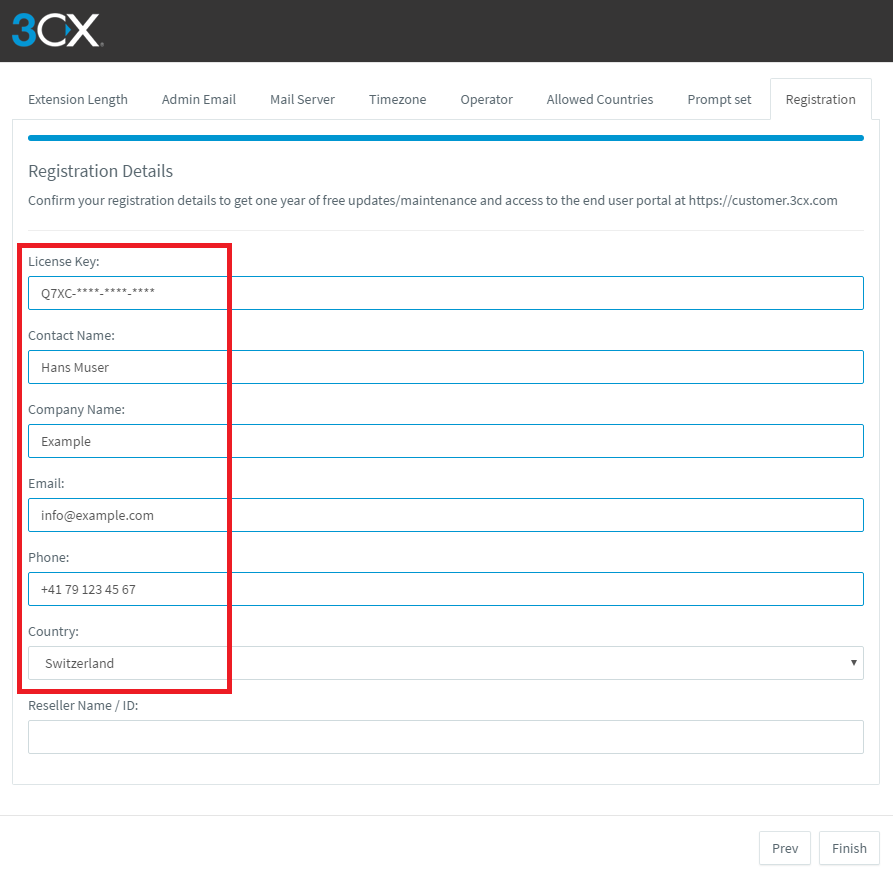
Anmeldung
3CX Webinterface → Grundkonfiguration → Registrierung
- Um die Registrierung abzuschließen, müssen möglicherweise weitere Details eingegeben werden
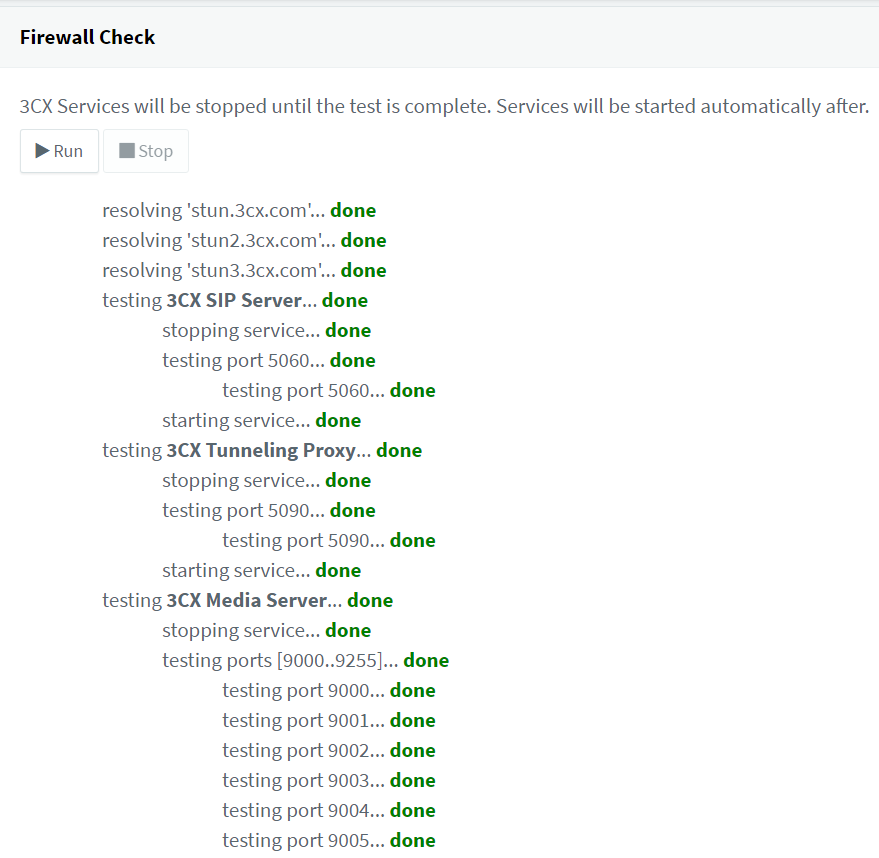
Firewall Check
Überprüfung der Firewall-Ports
3CX-Weboberfläche → Dashboard → Firewall-Prüfung
- Testen Sie, ob die Firewall-Ports für Kommunikation geöffnet sind
3CX-Systemaktualisierungen
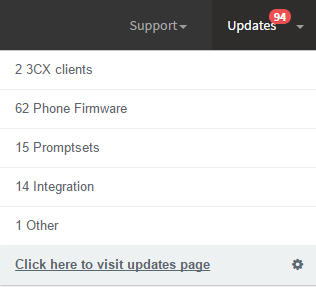
3CX-Weboberfläche → Dashboard → Updates
- Peoplefone empfiehlt, die folgenden Aktualisierungen vorzunehmen:
- 3CX-Clients (alle)
- Telefon-Firmware (nur das Nötigste)
- Eingabeaufforderungen (nur das Nötigste)
- Integrationsupdates zu installieren (alle)
- Andere (alle)
Trunk erstellen
3CX-Webinterface → SIP-TRunks→ SIP-Trunks hinzufügen
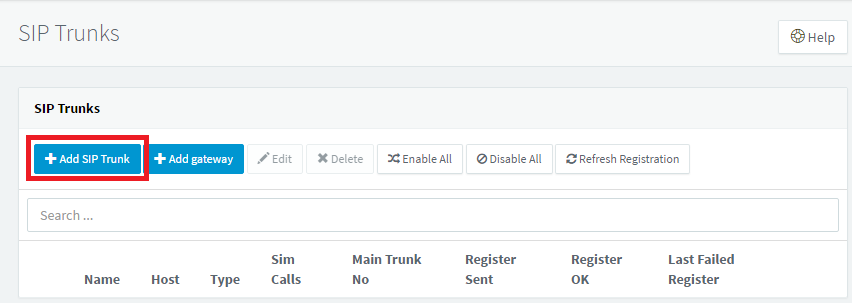
SIP-Trunk-VoIP-Provider hinzufügen
3CX Webinterface → SIP Trunks→ SIP-Trunks hinzufügen
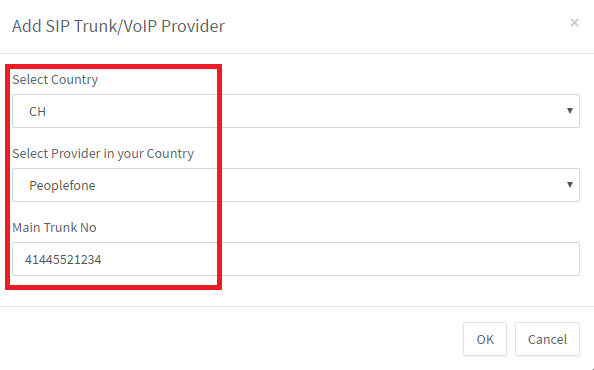
- Wählen Sie das Land aus
- Wählen Sie peoplefone aus
Haupt Nummer
Trunk Details
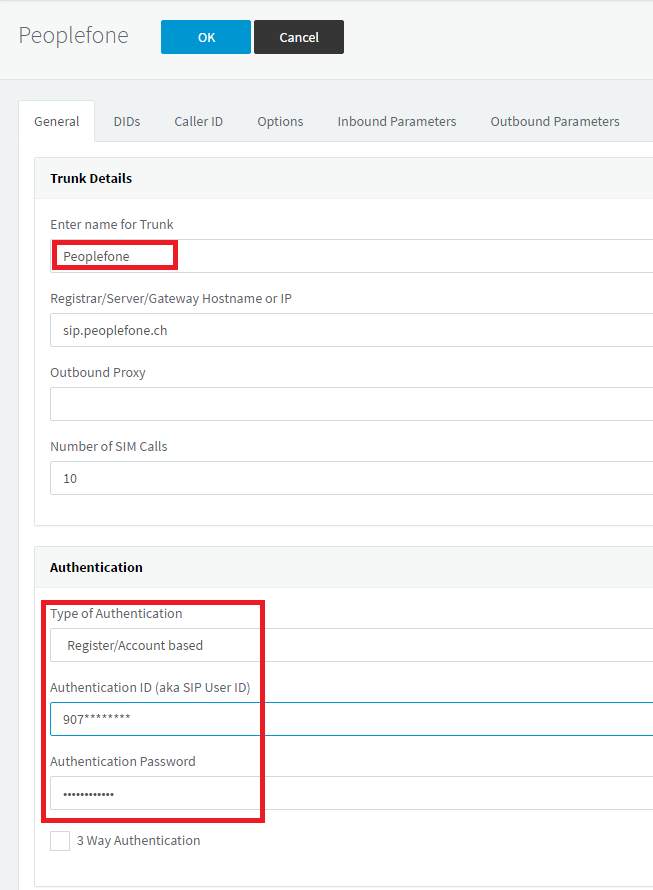
3CX-Webschnittstelle → SIP-Trunk→ SIP-Trunk hinzufügen → Trunk und Authentifizierung
- Geben Sie den Namen für den Trunk ein
- Zur Authentifizierung benötigen Sie die SIP-Informationen
Eingehende Regeln
DID-Eingangsregel hinzufügen
3CX-Webinterface → SIP-Trunk→ DID-Eingangsregel hinzufügen
- Klicken Sie auf DID-Regel hinzufügen
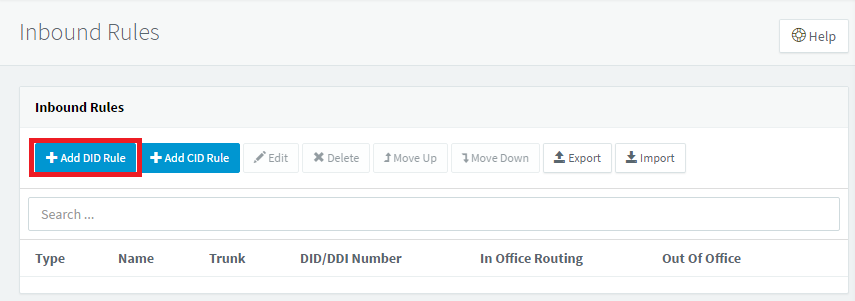
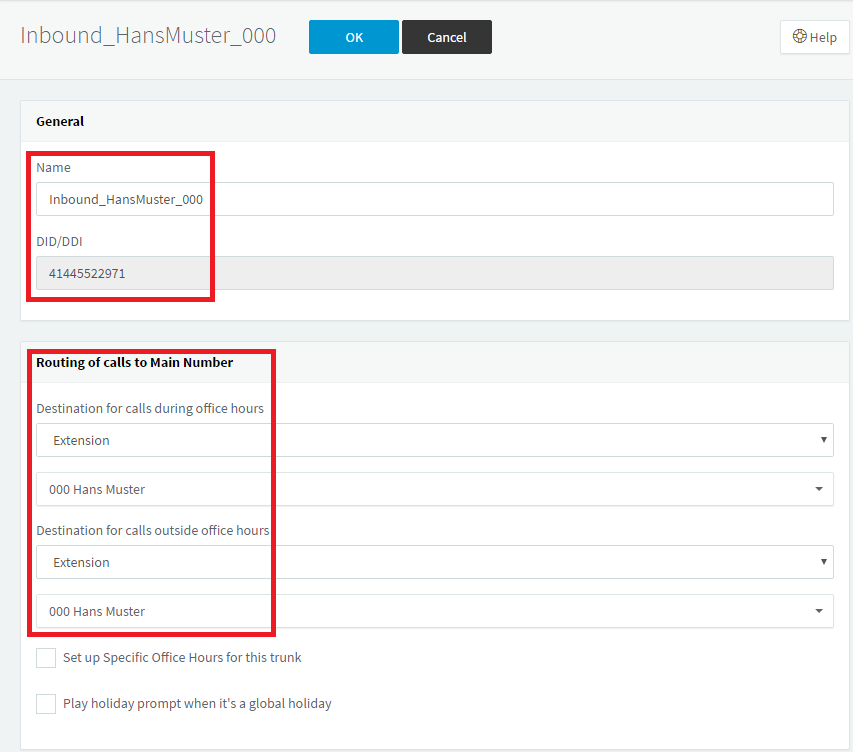
- Geben Sie einen Namen für die Eingangsregel ein
- Definieren Sie DID / DDI
- Stellen Sie die erforderlichen Maßnahmen innerhalb und außerhalb der Bürozeiten ein
Ausgehende Regeln
Ausgehende Regeln hinzufügen
3CX-Webinterface → Ausgehende Regeln → Ausgehende Regel hinzufügen
- Klicken Sie auf DID-Regel hinzufügen
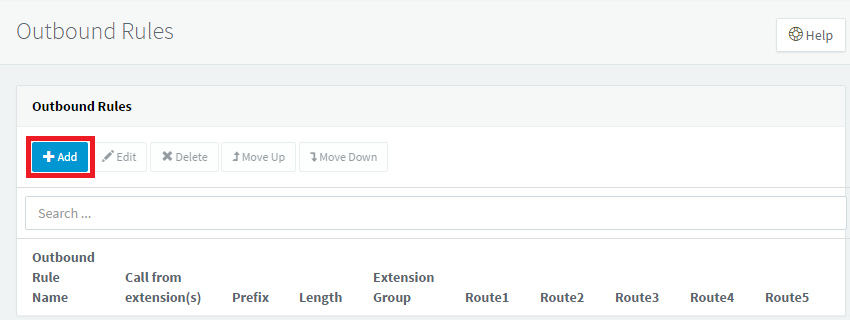
- Geben Sie der Regel einen Namen
- Legen Sie ein Präfix fest
- Konfigurieren Sie die Route

Erweiterungen
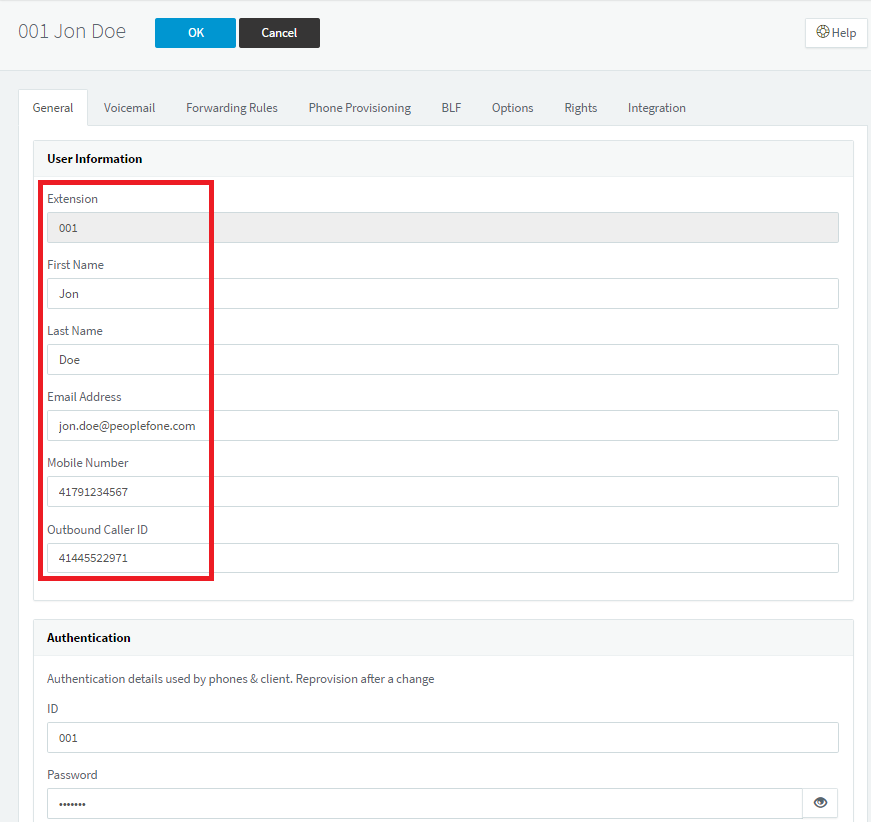
Erweiterung hinzufügen
3CX-Webinterface → Erweiterungen → Erweiterungen hinzufügen
- Klicken Sie auf Hinzufügen, um eine Erweiterung zu erstellen
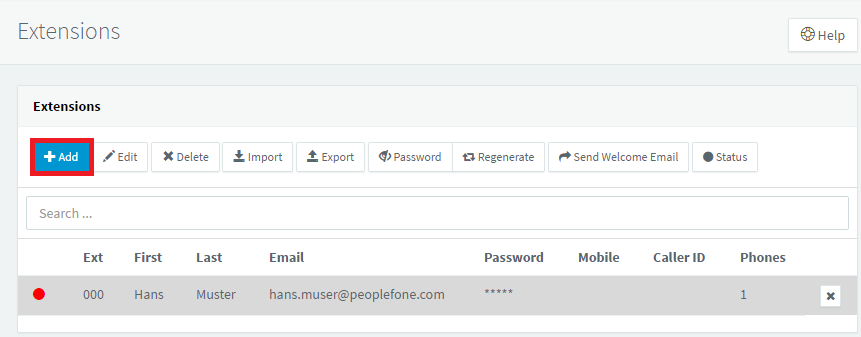
- Füllen Sie die Felder mit den erforderlichen Informationen aus
- Mit der Outbound Caller ID können Sie die Nummern angeben, die nach außen signalisiert werden sollen. Dies funktioniert jedoch nur, wenn Clip Open aktiviert ist.
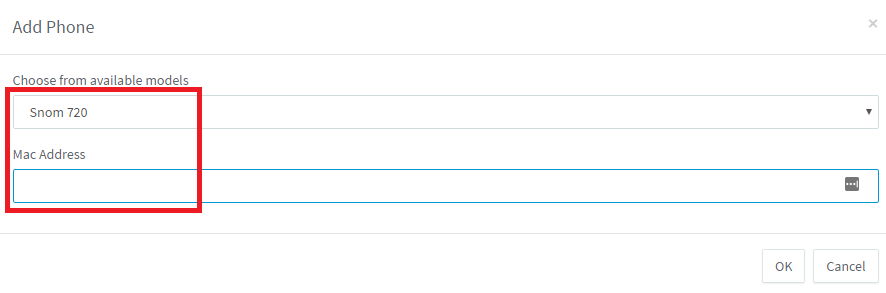
Telefonbereitstellung für Nebenstellen
3CX Webinterface → Erweiterungen → Bearbeiten → Telefonbereitstellung
- Klicken Sie auf Hinzufügen
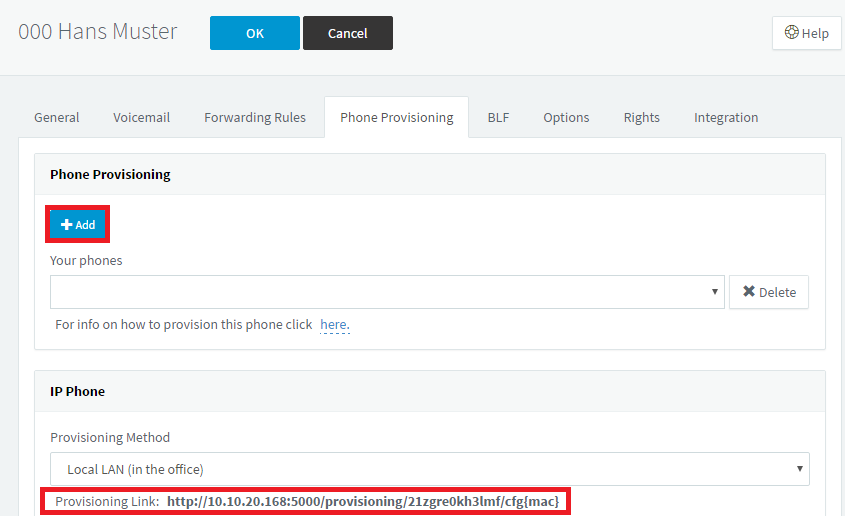
- Wählen Sie ein Gerät aus
- Stellen Sie die MAC-Adresse Ihres Geräts ein
Fehlerbehebung bei Erweiterungen
3CX Webinterface → Erweiterungen → Optionen → Fehlerbehebung
- Wenn Sie Audioprobleme mit Ihrem peoplefone HOSTED 3CX-System haben (keine Stimme), aktivieren Sie PBX Delivers Audio
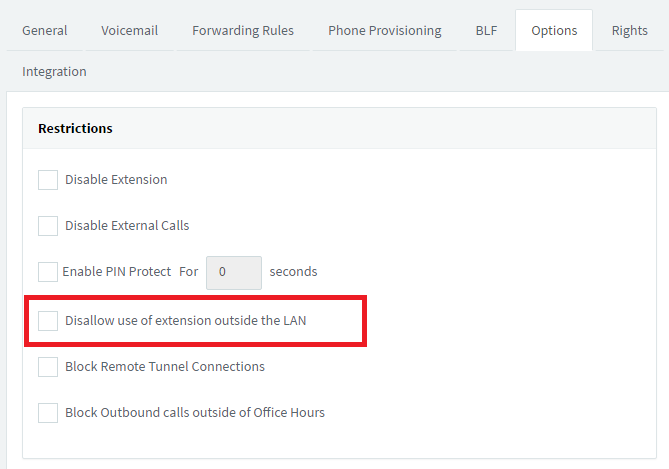
Externer Zugang «WAN»
3CX Webinterface → Erweiterungen → Bearbeiten → Optionen
- Deaktivieren Sie die Option “Untersagung von Nebenstellen außerhalb des LAN deaktivieren”.
Telefoneinstellungen
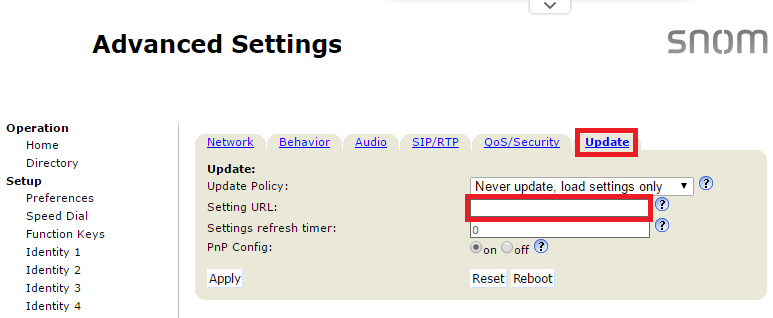
Settings URL
SNOM Webinterface → Erweiterte Einstellungen → Update → URL einstellen
- Sie müssen den Empfangsbereitstellungslink in Ihrem Gerät konfigurieren
(z. B. SNOM).
SBC «Session Border Controller»
Mit dem «Session Border Controller» von 3CX SBC können Sie problemlos über einen 3CX-Tunnel eine Verbindung zu einer 3CX-Telefonanlage herstellen. Der 3CX-Tunnel überträgt SIP- (Signaling) und RTP- (Media-) Pakete von einem Standort zum PBX-Server, die Übertragung erfolgt über das TCP-Protokoll.
Weitere Informationen:
- 3CX SBX → Detailinformationen
- 3CX SBC → Vergleich der Controller v14 und v15
- 3CX SBC → Erforderliche Firewall-Einstellungen
Möglichkeit der Nutzung:

SBC-Konfiguration peoplefone 3CX HOSTED v14
Für Ihr peoplefone 3CX HOSTED-System erhalten Sie von Ihrem Partner ein Datenblatt mit technische Daten für das peoplefone 3CX HOSTED. Um Ihren Session-Board-Controller zu installieren, müssen Sie die folgenden Informationen entsprechend Ihrer, von peoplefone erhaltenen, Ergänzung anpassen.
Bridge/123456
Name=3CXSBC14.0.48426.61
ID=123456
LocalSipPort=5060
LocalSipAddr=0.0.0.0
Password=********
PbxSipPort=5060
PbxSipIP=95.128.80.15
SecurityMode=0
TunnelAddr=95.128.80.15
TunnelPort=29090
FailoverInterval=90
PrintStatsInterval=30
ReconnectInterval=30 [Log]
Type=file # cout, cerr, file, syslog
File=C:\ProgramData\3CXSBC\Logs\3cxsbc.log Level=ERR # "ERR", "NONE", "EMERG", "ALERT", "CRIT", "ERR", "WARNING", "NOTICE", "INFO",
"DEBUG", "STACK", "ERR", "VERBOSE"
Anpassungen für die Konfiguration:
- LocalSipAddr= z.B.:0.0.0.0
- Die lokale SIP-Adresse wird nicht benötigt, Sie können 0.0.0.0 hinterlegen, bei dieser Konfiguration werden alle Schnittstellen berücksichtigt.
- Die lokale SIP-Adresse wird nicht benötigt, Sie können 0.0.0.0 hinterlegen, bei dieser Konfiguration werden alle Schnittstellen berücksichtigt.
- Password= z.B.: ********
- Geben Sie das Tunnel-Passwort ein, das Sie von Ihrem 3CX-System aus lesen können. «Einstellungen – Sicherheit – 3CX-Tunnel»
- Geben Sie das Tunnel-Passwort ein, das Sie von Ihrem 3CX-System aus lesen können. «Einstellungen – Sicherheit – 3CX-Tunnel»
- PbxSipIP= z.B.:95.128.80.15 oder 95.128.80.16
- Geben Sie den Server von peoplefone ein, Sie finden die Informationen auf Ihrem Supplement (95.128.80.15, 95.128.80.16)
- Geben Sie den Server von peoplefone ein, Sie finden die Informationen auf Ihrem Supplement (95.128.80.15, 95.128.80.16)
- TunnelAddr= z.B.:95.128.80.15 oder 95.128.80.16
- Geben Sie hier die IP-Adresse für den Tunnel ein (PbxSipIP)
- Geben Sie hier die IP-Adresse für den Tunnel ein (PbxSipIP)
- TunnelPort= z.B.:29090
- Geben Sie hier den SIP-Tunnel-Port ein
peoplefone Funktionen
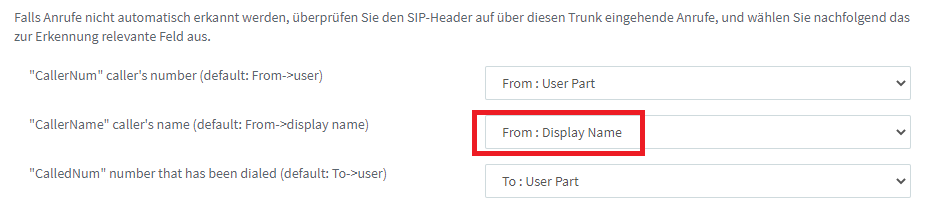
Telefonbuchsuche local.ch / search.ch
Mit peoplefone haben Sie die Möglichkeit, eingehende Nummern über local.ch / search.ch nachzuschlagen. Dies geschieht, bevor wir den Anruf auf die Telefonanlage zustellen, funktioniert jedoch nicht mit den Standardeinstellungen der 3CX-Anlage. Die Informationen werden auf dem SIP-TRUNK in den eingehenden Parameter «CallerName” caller’s name (default: From->display name)» des SIP Invite-Headers geschrieben, 3CX verwendet jedoch standardmäßig den Parameter «From: User Part». Dies kann leicht in den Trunk-Optionen geändert werden, wie im Screenshot gezeigt.
Ausgehend als “Unbekannt” telefonieren
Derzeit funktioniert die Standard-Peoplefone-Vorlage nicht mit der Funktion, bei der Sie “* 5” als Präfix für eine Nummer eingeben, um sie mit “Anonym” anstelle des regulären CLIP zu wählen
Die folgenden ausgehenden Parameter müssen in den Trunk-Einstellungen geändert werden:

Deaktivieren Sie die 3 Parameter “RPID – Calling Party”, indem Sie sie in “Leave default value” ändern.
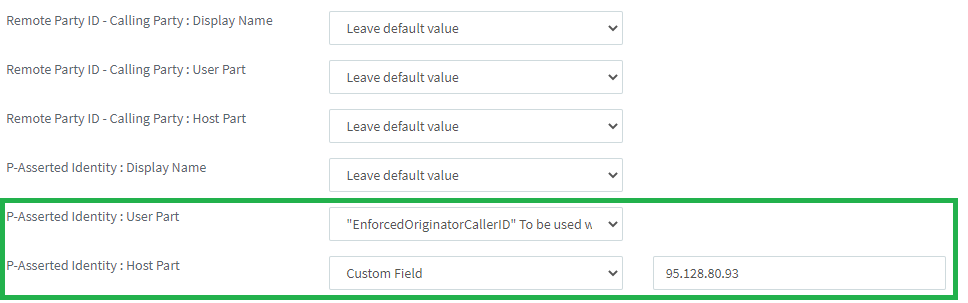
Sobald die Änderungen übernommen wurden, sollte das anonyme Präfix * 5 wie vorgesehen funktionie